System Operands types include: System Bits (SB), System Integers (SI), System Double Word (SDW), and System Long (SL).
System Operands are used by the controller's operating system to manage certain functions and values. Many System Operands are linked to fixed parameters and are read-only, such as SB 2 Power-up bit, which turns ON for a single cycle whenever the controller powers up.
Other System Operands can be written to by the program, or via INFO Mode. For example, to calculate the current internal temperature of the controller, you can turn on SB 14; the controller will then write the current temperature into SI 14, which is read only.
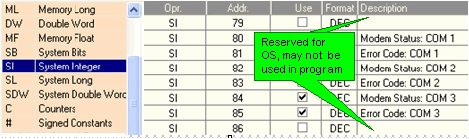
To display a list of System Operands with their descriptions, click on the Operand tab in the Output Window at bottom of the screen, then select the operand type. Scroll down to view the list.
Note ♦ |
System Operands have preset descriptions that describe their function. If descriptions have been changed, or if you are opening a project that was written using a different version of VisiLogic, you can display restore descriptions via the Project Menu Project>System Descriptions>Restore all System Descriptions. |
♦ |
All SBs and SIs
which do not have descriptions are reserved for use by the system.
|
# |
Description |
Turns ON when: |
Turns OFF when: |
Reset by: |
SB 0 |
Always 0 |
Never |
Always |
|
SB 1 |
Always 1 |
Always |
Never |
|
SB 2 |
Power-up bit |
Power-up occurs, for 1 scan |
|
|
Note that SB2 is limited to 800 instances per program. You can use SB2 to drive MBs and use those in your program. If you are using Enhanced Vision, note that XBs are initialized at powerup. |
||||
SB 3 |
1 second pulse This is a squarewave of 1 second duration, with a 50% duty cycle |
|
|
|
SB 4 |
Divide by zero |
|
|
|
SB 5 |
Outputs short circuit |
|
|
|
SB 6 |
Keyboard is active |
|
|
|
SB 7 |
100 mS pulse |
|
|
|
SB 8 |
Battery low (1=low) |
The PLC continually monitors the battery. When the battery is low for a minimum of 5 second, SB 8 is set to 1. Before checking SB 8 wait a minimum of 5 seconds after turning on the controller. |
|
Reset at power-up |
SB9 |
RAM failure :Bit value is not 0 or 1 |
Battery needs to be replaced, or RAM has failed |
Battery and RAM are functioning |
Reset by user: via info, or Communication |
SB 10 |
Float Error |
By OS when the result of a float operation is an illegal float value. Error code is in SI440. |
|
By user, or at power-up. |
SB 11 |
User Stack Overflow |
|
|
|
SB 13 |
ON at Rising Edge of SB3 (1sec pulse) |
Turns ON when SB3, 1 second pulse, rises |
|
OS |
SB 14
|
Calculate current controller temperature (not supported by V120/130/350) |
By user. When SB 14 turns ON, the value in SI 14, Current Controller Temperature updates. |
By OS |
OS |
SB 15 |
ON at Rising Edge of SB7 (100 mS pulse) |
Turns ON when SB7, 100mS second pulse, rises |
|
OS |
# |
Description |
Turns ON when: |
Turns OFF when: |
Reset by: |
SB 16 |
Touchscreen Active |
Touchscreen is actually being touched Note that the touch property must be assigned to a variable. If this property is assigned, touching the variable activates it, causing it to be marked by the blinking cursor. |
The screen is not being touched. |
OS |
SB 17 |
Enable/Disable Touch-screen indication, Message Board function |
User turns ON to enable a message to be handwritten on the touch-screen with a stylus |
User turns it off. |
User |
SB 22 |
Enable Virtual Keypad (Relevant only to Standard Vision + Touchscreen, not Enhanced)) |
|
|
User/ OS |
# |
Description |
Turned ON |
Turned Off |
Comments |
SB 23 |
Enable all HMI keys during Keypad Entry |
By program or user |
Off by default. Once turned ON, must be turned OFF by program or user. |
By default, an active Keypad Entry variable suspends the normal activity of keypad keys. This means that the following SBs do not rise during keypad entry: SB 40-49, 51, 52, 55, & 56. Turning SB 23 enables the SBs to rise during keypad entry. |
# |
Description |
Turned ON |
Turned Off |
Comments |
SB 24 |
Initialize and Reset PLC |
By program or user |
Off by default. Once turned ON, must be turned OFF by program or user. |
Set this to cause PLC to reset, and to initialize all operands to 0. Note that SB 300 performs Reset only. |
SB25 |
Use operand value as Index of HMI variable |
User |
User |
Enables a variable to be indirectly addressed |
SB 26 |
Exiting OS Draw Mode (ON for 1 cycle after OS draw) |
By OS Turns ON for a single cycle when SB 28 turns OF. This happens at the following times:
|
By OS |
OS Draw Mode means that the controller's Operating System takes control of the LCD screen:
|
SB 27 |
Disable all keypad automation (touch-screen + keyboard models only, V280) |
By program
|
By program |
If SB 27 is ON when a Display is shown:
|
SB 28 |
LCD: controlled by OS (OS drawing on LCD) |
By OS at entry to drawing mode, remains ON during the drawing task:
|
By OS when the OS exits the drawing mode:
|
Any Ladder- drawn elements (ex. Draw Axis, Trends, Draw Pixel/Line), are cleared when SB 28 turns ON; the programmer may use the Negative Transition of SB 28 to refresh these elements on the LCD.
|
SB 29 |
HMI keypad entries complete, reload vars
(Relevant for non touch-screen models: V120, V230,V260) |
By program |
By OS |
Turn SB 29 ON after data is keyed into any variable, to enable the user to skip keying in data for the remaining variables in the current display. When SB 29 is ON:
|
SB 30 |
Keypad Vars Locked (Standard: OS turns ON after entries complete (Enhanced: User turns ON/OFF) (Relevant for non touch-screen models: V120, V230,V260)
|
Standard Vision
Enhanced Vision (non touch-screen)
|
|
Use SB 30 to run ladder tasks that require data entered via keypad.
Note ♦ To immediately re-enable data entry (restore cursor) turn SB31 ON |
SB 31 |
Refresh current LCD screen display variables (Relevant for non touch-screen models: V120, V230,V260) |
By program |
By OS |
Restores the Display cursor, re-activates all keypad entry variables in the current Display. |
SB 32 |
HMI keypad entry in progress |
By OS |
By OS |
This turns ON automatically when the blinking cursor is on an active variable. |
SBs 33 and 34 function when an HMI Display that calls a subroutine is loaded/unloaded from the display screen. Note ♦ ASCII String Display: In cases where a Display contains a Display ASCII String Variable, and the linked subroutine contains the Display String 'trigger' MB, reset this MB when the Display unloads by using the falling edge of SB 34. |
||||
SB 33 |
Load Display with linked Call Subroutine |
By OS |
By OS |
When a Display containing a Call Subroutine starts loading, SB 33 turns ON for a single scan cycle the first time the linked subroutine runs. Use this SB to initialize operands in the HMI subroutine. |
SB 34 |
UnLoad Display with linked Call Subroutine |
By OS |
By OS |
When a Display containing a Call Subroutine starts unloading, SB 34 turns ON for a single scan cycle the last time the linked subroutine runs. |
SB 36 |
INFO mode |
By OS, Remote Access, or program |
Turns OFF when user exits Info Mode |
|
SB 37 |
Exclude last Display from FIFO |
By Remote Access, or program |
OS |
Enables user to skip going back to certain Displays. |
SB 38 |
Invert Touchscreen element pixels (Text, images) |
By program |
By program |
If a Touchscreen text or image element is touched and this bit is on, the pixels in the element reverse color. |
SB 110 |
Draw: Out of Range |
The OS attempts to draw a line or pixel outside of the legal limits of the controller's LCD. |
At the beginning of every cycle |
OS |
SB 250 |
Keypad entry within limits |
By OS |
By OS " The current Display is either re-called or changed, or " At the beginning of the next program cycle. |
Turns ON for one scan when the entered value is within the Min/Max limits set in the variable's parameters. |
SB 251 |
Keypad entry exceeds limits |
By OS |
By OS " The current Display is either re-called or changed, or " At the beginning of the next program cycle. |
Is ON when the entered value is within the Min/Max limits. Note ♦ When this SB is ON, the blinking cursor remains on the active variable even after the user presses Enter. |
# |
Description |
Turns ON when: |
Turns OFF when: |
Reset by: |
SB 26 |
Exiting OS Draw Mode (ON for 1 cycle after OS draw) OS Draw Mode means that the controller's Operating System takes control of the LCD screen:
|
Turns ON for a single cycle when SB 28 turns OFF. This happens at the following times:
|
At all other times |
OS |
SB 27 |
Enter Display without active Keypad Entry
Variables
|
By program |
By program |
|
SB 28 |
LCD controlled by OS (OS drawing) OS Draw Mode means that the controller's Operating System takes control of the LCD screen:
|
|
|
OS |
SB 29 |
Current keypad entry sets SB 30 (HMI keypad
entries complete) Also refreshes all Display variables on-screen |
By program |
By program |
OS |
SB 30 |
HMI keypad entries completed Note ♦ Turning this SB OFF, via SB31, enables the variables to be reactivated. |
Turns ON when:
|
Turns OFF when:
|
OS |
SB 31 |
Refresh current LCD screen display variables |
Turning this ON reloads the display, initializing all Keypad Entry variables. |
|
OS |
SB 32 |
HMI keypad entry in progress |
|
|
OS |
SBs 33 and 34 function when an HMI Display that calls a subroutine is loaded/unloaded from the display screen. Note ♦ ASCII String Display: In cases where a Display contains a Display ASCII String Variable, and the linked subroutine contains the Display String 'trigger' MB, you can reset this MB when the Display unloads by using the falling edge of SB 34. |
||||
SB 33 |
Load Display with linked Call Subroutine - Use this SB to initialize operands in the HMI subroutine. - Do not link this SB to a positive or negative transitional contact. |
When a Display containing a Call Subroutine starts loading, SB 33 turns ON for a single scan cycle the first time the linked subroutine runs. |
|
OS |
SB 34 |
UnLoad Display with linked Call Subroutine |
When a Display containing a Call Subroutine starts unloading, SB 34 turns ON for a single scan cycle the last time the linked subroutine runs. |
|
OS |
# |
Description |
Turns ON when: |
Turns OFF when: |
Reset by: |
SB 35 |
OnLine Test Point |
During OnLine mode, Single Scan, when more than 1 instance of OnLine Test Point is activated (receives RLO). |
One or none instances are activated |
|
# |
Description |
Turned ON |
Turned Off |
Comments |
SB 36 |
INFO mode |
By OS, Remote Access, or program |
Turns OFF when user exits Info Mode |
Delay time to enter Info Mode is 4 seconds, may be modified via SI 50 |
# |
Description |
Turned ON |
Turned Off |
Comments |
SB 37 |
Exclude last Display from FIFO |
By program |
By program |
Enables user to skip going back to certain Displays |
# |
Description |
Turned ON |
Turned Off |
Comments |
SB 38 |
Invert Touchscreen element pixels (Text, images) |
By program |
By program |
If a Touchscreen text or image element is touched and this bit is on, the pixels in the element reverse color. |
# |
Description |
Turned ON |
Turned Off |
Comments |
SB 39 |
FLASH on LCD, Display not Refreshed (V570, 290-C,530) |
FLASH memory is on screen |
By OS |
|
Note that the presence of function keys is model-dependant. |
||||
# |
Description |
Turns ON when: |
Turns OFF when: |
Reset by: |
SB 40 |
Key: # 0 |
Key is pressed/held down |
Key is released |
OS |
SB 41 |
Key: # 1 |
|||
SB 42 |
Key: # 2 |
|||
SB 43 |
Key: # 3 |
|||
SB 44 |
Key: # 4 |
|||
SB 45 |
Key: # 5 |
|||
SB 46 |
Key: # 6 |
|||
SB 47 |
Key: # 7 |
|||
SB 48 |
Key: # 8 |
|||
SB 49 |
Key: # 9 |
|||
SB 50 |
Plus/Minus |
|||
SB 51 |
Left Arrow |
|||
SB 52 |
Right Arrow |
|||
SB 53 |
ENTER |
|||
SB 54 |
<i> (ON when in Info mode, may be turned ON in order to enter Info, via Remote Access or user program) |
|||
SB 55 |
Up |
|||
SB 56 |
Down |
|||
SB 57 |
ESC |
|||
SB 58 |
F1 |
|||
SB 59 |
F2 |
|||
SB 60 |
F3 |
|||
SB 61 |
F4 |
|||
SB 62 |
F5 |
|||
SB 63 |
F6 |
|||
SB 64 |
F7 |
|||
SB 65 |
F8 |
|||
SB 66 |
F9 |
|||
SB 67 |
F10 |
|||
SB 68 |
F11 |
|||
SB 69 |
F12 |
|||
SB 70 |
F13 |
|||
SB 71 |
F14 |
|||
SB 72 |
F15 |
Note that the presence of function keys is model-dependant. |
||||
# |
Description |
Turns ON when: |
Turns OFF when: |
Reset by: |
SB 73 |
Disable HMI cursor blinking (Turn ON to disable blinking) |
By user program |
By user program |
By user program |
# |
Description |
Turns ON when: |
Turns OFF when: |
Reset by: |
SB 75 |
Download Complete, PLC and HMI applications |
When Download is finished, Turns ON for single scan ; PLC can then run application |
The scan after Download ends |
OS |
# |
Description |
Turns ON when: |
Turns OFF when: |
Reset by: |
SB 76 |
Keypad Entry: Focus (V130) If SB 76 is OFF after Keypad Entry, the user must use the arrow keys to move to the next variable in the Variable Tab Order If SB 76 is ON, the user moves to the next variable by pressing the Enter button twice: - Once to 'approve' the value - Once to jump to and open the next variable for data entry. To enable the
user to press Enter once, to both jump to and
to automatically open the next variable for data entry, turn
ON both SB76 and SB108 (Press "Enter" 1x) |
By user |
By user |
By user, or at Power-up |
Each port is linked to an SB indicating modem communication status. These can be used as a condition to sending new messages. |
||||
# |
Description |
Turns ON when: |
Turns OFF when: |
Reset by: |
SB 77 |
Modem 'Busy': COM Port 1 |
Port is busy transmitting or receiving |
Port is free |
OS |
SB 78 |
Modem 'Busy': COM Port 2 |
|||
SB 79 |
Modem 'Busy': COM Port 3 |
Each port is linked to 2 SBs indicating COM Port/Modem initialization status following COM Init. Both SBs are initialized to OFF by the OS, at Power-up and at the beginning of COM Init process. When COM Init is complete, one is ON, the other OFF. |
|||||
# |
Description |
||||
SB 80 |
Modem Initialized: COM Port 1 |
Example: COM Port 1 |
|||
SB 81 |
COM Port/Modem Initialization Failed: COM Port 1 |
SB 80 |
SB 81 |
|
|
SB 82 |
Modem Initialized: COM Port 2 |
0 |
0 |
After Power-up, before COM Init |
|
SB 83 |
COM Port/Modem Initialization Failed: COM Port 2 |
0 |
1 |
Modem Initialization attempt failed, Modem is not initialized |
|
SB 84 |
Modem Initialized: COM Port 3 |
1 |
0 |
Modem Initialization attempt succeeded, Modem is initialized. |
|
SB 85 |
COM Port/Modem Initialization Failed: COM Port 3 |
1 |
1 |
Not possible |
Each port is linked to an SB indicating modem connection status. These can be used in conjunction with SBs 132-137, which indicate indicating whether incoming or outgoing data is flowing through the port, to troubleshoot problems as shown in the Help topic Modem Troubleshooting. |
||||
# |
Description |
Turns ON when: |
Turns OFF when: |
Reset by: |
SB 86 |
Modem Connection Status: COM Port 1 |
PLC receives 'Connect' string from modem |
|
OS, at Power-up |
SB 87 |
Modem Connection Status: COM Port 2 |
|||
SB 88 |
Modem Connection Status: COM Port 3 |
See Help topic Detecting short-circuited end devices |
||||
# |
Description |
Turns ON when: |
Turns OFF when: |
Reset by: |
SB 91 |
I/O Exp. Module--Command buffer is full |
ON when commands cannot be sent to the I/O module. |
OFF when commands can be sent to the I/O module. |
|
# |
Description |
Turns ON when: |
Turns OFF when: |
Reset by: |
SB 100 |
GPRS modem connected |
|
|
OS |
# |
Description |
Turns ON when: |
Turns OFF when: |
Reset by: |
SB 104 |
Enable MODBUS over GPRS COM 1 |
Must be set by user, before the MODBUS Configuration |
User |
User |
SB 105 |
Enable MODBUS over GPRS COM 5 |
|||
SB 106 |
Enable MODBUS over GPRS COM 6 |
# |
Description |
Turns ON when: |
Turns OFF when: |
Reset by: |
SB 102 |
MODBUS Read long: Transpose 16 bits of 32-bit long |
By User program |
|
User |
# |
Description |
Turns ON when: |
Turns OFF when: |
Reset by: |
SB 108 |
Press "Enter" 1x (V130) If BOTH SB76 and SB108 are ON, after entering a keypad value, the user needs to press Enter only once, to approve the value, and to automatically jump to and open the next variable for data entry. Note that the user can press ESC to exit keypad entry mode. |
By user |
By user |
By user |
When a user enters a value via keypad, by default pressing the Left/Right arrows jumps between the keypad entry fields. To use the Up/Down arrows instead, set SB 109 to 1. |
||||
# |
Description |
Turns ON : |
Turns OFF : |
Reset by: |
SB 109 |
V130
only. |
User Program |
Default. User Program |
User |
# |
Description |
Turns ON when: |
Turns OFF when: |
Reset by: |
SB 110 |
Draw: Out of Range |
The OS attempts to draw a line or pixel outside of the legal limits of the controller's LCD. |
At the beginning of every cycle |
OS |
When this is ON, the Virtual Keypad is disabled but the physical Keypad is enabled (V560) |
||||
# |
Description |
Turns ON : |
Turns OFF : |
Reset by: |
SB 111 |
V560
only. |
User Program |
Default. User Program |
User |
# |
Description |
Turns ON : |
Turns OFF : |
Reset by: |
SB 112 |
On-Board USB port detected |
OS |
|
Each
one of the V130 keypad keys 2 to 9 are marked with both
letters and numbers. For example, Key 2 is marked with the
numeral 2, and by the letters abc. By default, at keypad entry,
the a single keypress enters '2', two key presses enter 'a',
three enter 'b', and so on. |
||||
# |
Description |
Turns ON : |
Turns OFF : |
Reset by: |
SB 115 |
V130 only. Reverse key letter/number order |
User Program |
Default. User Program |
User |
These SBs are only relevant for those model controllers that comprise a built-in USB port | ||||
# |
Description |
Turns ON : |
Turns OFF : |
Reset by: |
SB 112 |
On-Board USB |
Set to "1" when PLC contains a built-in USB port |
OS |
OS |
SB 113 |
USB cable - Connected to PC |
set to "1" when connected |
OS |
OS |
When you save a Trend to an SD card, each time you start and stop the save, another segment is added to the .utr file. |
||||
# |
Description |
Turns ON : |
Turns OFF : |
Reset by: |
SB 116 |
SD Trends to SD: Set to Overwrite .utr |
User application |
User application |
User |
Use these to control the display of Trend segments on the HMI screen. Use the inverted contact of SB119 as a condition. |
||||
SB 117 |
SD Trends: Jump to next segment |
User application |
User application |
User |
SB 118 |
SD Trends: Jump to previous segment |
User application |
User application |
User |
SB 119 |
SD Trends: System busy - Draw Trend is gathering data |
User application |
User application |
User |
SBs 120-125 register the signals that each port receives from the DTR and DSR pins of a serial communication cable. The DTR SBs 120, 122, and 124 are also used by the OS to control the DTR signal during RS485 serial communications, and during GPRS communications using the Sony Ericsson GPRS modem. |
||||
# |
Description |
Turns ON when: |
Turns OFF when: |
Reset by: |
SB 120 |
DTR COM Port 1 (signal output from PLC) |
DTR signal present |
DTR signal absent |
OS, may also be reset by user |
SB 121 |
DSR COM Port 1 (signal input to PLC) |
DSR signal present |
DSR signal absent |
OS |
SB 122 |
DTR COM Port 2 (signal output from PLC) |
DTR signal present |
DTR signal absent |
OS, may also be reset by user |
SB 123 |
DSR COM Port 2 (signal input to PLC) |
DSR signal present |
DSR signal absent |
OS |
SB 124 |
DTR COM Port 3 (signal output from PLC) |
DTR signal present |
DTR signal absent |
OS, may also be reset by user |
SB 125 |
DSR COM Port 3 (signal input to PLC) |
DSR signal present |
DSR signal absent |
OS |
Each port is linked to 2 SBs indicating when incoming or outgoing data is flowing through the port. To troubleshoot problems, use these in conjunction with the Modem Connection Status SBs 86-88, as shown in the topic Modem Troubleshooting. |
||||
# |
Description |
Turns ON when: |
Turns OFF when: |
Reset by: |
SB 132 |
COM Port 1, Data Transmission |
During data send |
When data is not being sent |
OS |
SB 133 |
COM Port 2, Data Transmission |
|||
SB 134 |
COM Port 3, Data Transmission |
|||
SB 135 |
COM Port 1, Data Receive |
During data reception |
When data is not being received |
OS |
SB 136 |
COM Port 2, Data Receive |
|||
SB 137 |
COM Port 3, Data Receive |
# |
Description |
Turns ON : |
Turns OFF : |
Reset by: |
SB 140 |
Remote Access - Read Only |
User
application |
User application |
User |
Note ♦ |
The Vision700 controller series comprises a built in Ethernet port, and many of the Ethernet system operands listed below do not apply to the V700. Please check the topic Vision700 - Using Ethernet for complete information. |
# |
Description |
Turns ON when: |
Turns OFF when: |
Reset by: |
Comments |
SB 141 |
Ethernet: Card Exists |
Ethernet card is found |
No Ethernet card is installed |
|
When the Ethernet: Card Initialization FB runs, the PLC checks whether an Ethernet card is installed. |
SB 142 |
Ethernet: Card Initialized |
Ethernet card initialization succeeds |
Ethernet card initialization fails |
|
|
SB 143 |
Ethernet: Socket 0 Initialized |
Socket 0 initialization succeeds |
Socket 0 initialization fails |
|
|
SB 144 |
Ethernet: Socket 1 Initialized |
Socket 1 initialization succeeds |
Socket 1 initialization fails |
|
|
SB 145 |
Ethernet: Socket 2 Initialized |
Socket 2 initialization succeeds |
Socket 2 initialization fails |
|
|
SB 146 |
Ethernet: Socket 3 Initialized |
Socket 3 initialization succeeds |
Socket 3 initialization fails |
|
|
SB 147 |
Ethernet: Socket 0 Connected |
Connection established via Socket 0 |
Socket 0 is free |
|
SBs 147-150 turn ON when:
|
SB 148 |
Ethernet: Socket 1 Connected |
Connection established via Socket 1 |
Socket 1 is free |
|
|
SB 149 |
Ethernet: Socket 2 Connected |
Connection established via Socket 2 |
Socket 2 is free |
|
|
SB 150 |
Ethernet Status: Socket 3 Connected |
Connection established via Socket 3 |
Socket 3 is free |
|
|
SB 151 |
Ethernet Link: Communication established |
A link exists (cable plugged in) |
No link exists (cable disconnected) |
|
This refers to the physical Ethernet cable |
SB 152 |
Ethernet Link: 10baseT |
When a 10baseT link is detected, during data transmit/ receive. |
When a 10baseT link is not detected, during data transmit/ receive. |
|
|
SB 153 |
Ethernet Link: 100baseT |
When a 100baseT link is detected, during data transmit/ receive. |
When a 100baseT link is not detected, during data transmit/ receive. |
|
|
SB 154 |
Ethernet: data collision |
More than one device is transmitting data over the Ethernet network |
One or no devices are transmitting data over the Ethernet network |
|
|
SB 155 |
Ethernet: Socket 0 Send in Progress |
Data is being transmitted via Socket 0 |
Data is not being transmitted via Socket 0 |
|
|
SB 156 |
Ethernet: Socket 1 Send in Progress |
Data is being transmitted via Socket 1 |
Data is not being transmitted via Socket 1 |
|
|
SB 157 |
Ethernet: Socket 2 Send in Progress |
Data is being transmitted via Socket 2 |
Data is not being transmitted via Socket 2 |
|
|
SB 158 |
Ethernet: Socket 3 Send in Progress |
Data is being transmitted via Socket 3 |
Data is not being transmitted via Socket 3 |
|
|
SB 159 |
Enable Unicast, Socket 0 |
Turn ON (ON by default) to enable Socket 0 for Unicast |
Turn OFF to disable Socket 0 for Unicast |
|
|
SB 162 |
Link failed after card was properly initialized |
Turns ON if link falls after Card Init |
|
|
Use SB 168 to automatically re-establish the link. |
SB 163 |
Connection is Closed (Socket 0) |
By OS, when connection is closed |
|
|
SB turns ON when Close Connection is performed. This is after Transmit / Receive buffers are empty or 1-second timeout has passed. Socket is initialized. |
SB 164 |
Connection Closed (Socket 1) |
By OS, when connection is closed |
|
|
|
SB 165 |
Connection Closed (Socket 2) |
By OS, when connection is closed |
|
|
|
SB 166 |
Connection Closed (Socket 3) |
By OS, when connection is closed |
|
|
|
SB 167 |
Ethernet Critical error |
Turns ON at critical error |
|
|
OS reads Ethernet card registers to SI 300 - 427, then re-initializes the card. User must reset PLC |
SB 168 |
Enable "Link lost" auto recover |
Automatically retry link |
Do not automatically retry (default) |
|
SB 168 should be turned ON at power-up. It is OFF by default to preserve backwards compatibility with applications created previous to OS 4.70 B14. If SB 168 is ON, when the Ethernet link fails, the OS saves the Ethernet parameters and resets: • SB 142 Card Initialized • SBs 143-146 Socket initialized (Sockets 0-3) • SBs 147-150 Socket connected (Sockets 0-3) When the Ethernet link is reestablished, the O/S performs CARD INIT and SOCKET INIT for all 4 sockets according to the saved parameters. |
SB 169 |
Automatic reconnect requested, in progress (Socket 0) |
At Ladder |
|
|
TCP - Used as internal flags by O/S in order to perform auto reconnect (user parameters SI 107 – 110) |
SB 170 |
Automatic reconnect requested, in progress (Socket 1) |
|
|
|
|
SB 171 |
Automatic reconnect requested, in progress (Socket 2) |
|
|
|
|
SB 172 |
Automatic reconnect requested, in progress (Socket 3) |
|
|
|
|
SB 173 |
Automatic reconnect requested (Socket 0) |
|
|
|
|
SB 174 |
Automatic reconnect requested (Socket 1) |
|
|
|
|
SB 175 |
Automatic reconnect requested (Socket 2) |
|
|
|
|
SB 176 |
Automatic reconnect requested (Socket 3) |
|
|
|
# |
Description |
Turns ON : |
Turns OFF : |
Reset by: |
SB 178 |
Profibus Card Detected |
OS |
When SBs180-182 turns ON, the STX, ETX, or checksum of the received message was incorrect. |
|||
SB |
Description |
Turns ON when: |
Turns OFF when: |
180 |
COM1 Received Message Invalid, STX/ETX/Checksum (V570, 290-C,130) |
Received message is invalid |
Another message is received |
181 |
COM2 Received Message Invalid, STX/ETX/Checksum (V570, 290-C,130) |
||
182 |
COM3 Received Message Invalid, STX/ETX/Checksum (V570, 290-C,130) |
Each port has a Succeed and Fail SB. When the Send process begins from a particular COM port, for each and every message, both the Succeed and Fail SB turn OFF. If the message is sent successfully, the bit turns ON, indicating the success or failure of that message. If the message fails, when TimeOut is exceeded or because the modem reports an error, the bit remains OFF. Operands that are linked by the user to SMS FBs may be found in the topic SMS Operands. |
|||
SB |
Description |
Turns ON when: |
Turns OFF when: |
184 |
SMS: Transmission Succeeded, COM1 (ACK) |
Transmission succeeds |
Transmission begins |
185 |
SMS: Transmission Failed, COM1 (NACK) |
Transmission fails |
|
186 |
SMS: Transmission Succeeded, COM2 (ACK) |
Transmission succeeds |
|
187 |
SMS: Transmission Failed, COM2 (NACK) |
Transmission fails |
|
188 |
SMS: Transmission Succeeded, COM3 (ACK) |
Transmission succeeds |
|
189 |
SMS: Transmission Failed, COM3 (NACK) |
Transmission fails |
Use these together with SI 198 and 199 to write incoming SMS messages to a vector of operands. This does not affect the function of the SMS message function blocks. |
||||
# |
Description |
Turns ON when: |
Turns OFF when: |
Reset by: |
SB 198 |
SMS Arrived, Record the Received SMS Message Length in SI 198 |
If SB 199 is set, , SB 198 is set when a message is received |
User Program |
User Program |
SB 199 |
Save SMS to Memory Vector |
User Program |
The function of some operands depends on whether the CANbus network is defined as CANbus ISC or UniCAN.
To learn how to use these operands to communicate data, check the topic CANbus Networking. |
||||
# |
Description |
Turns ON when: |
Turns OFF when: |
Reset by: |
SB 200 |
CANbus Network operand |
|
|
|
SB 201 |
CANbus Network operand |
|
|
|
SB 202 |
CANbus Network operand |
|
|
|
SB 203 |
CANbus Network operand |
|
|
|
SB 204 |
CANbus Network operand |
|
|
|
SB 205 |
CANbus Network operand |
|
|
|
SB 206 |
CANbus Network operand |
|
|
|
SB 207 |
CANbus Network operand |
|
|
|
SB 208 |
CANbus Network operand |
|
|
|
SB 209 |
CANbus Network operand |
|
|
|
SB 210 |
CANbus Network operand |
|
|
|
SB 211 |
CANbus Network operand |
|
|
|
SB 212 |
CANbus Network operand |
|
|
|
SB 213 |
CANbus Network operand |
|
|
|
SB 214 |
CANbus Network operand |
|
|
|
SB 215 |
CANbus Network operand |
|
|
|
SB 236 |
CANbus Network communication error |
|
Error is fixed. |
|
SB 237 |
CANbus Network disable |
|
|
|
SB# |
Description |
Turned ON |
Turned Off |
Comments |
200 |
Broadcast bit |
When UniCAN broadcast MB is received whose status is ON. |
When UniCAN broadcast MB is received whose status is OFF. |
The user must initialize this SB |
201 |
High Priority Send Buffer Status |
When full |
When not full |
Use the negative transition of this SB as a Send UniCAN condition for High Priority messages |
202 |
Low Priority Send Buffer Status |
When full |
When not full |
Use the negative transition of this SB as a Send UniCAN condition for Low Priority messages |
203 |
UniCAN Broadcast in Progress |
When data is being sent |
When data is not being sent |
Use the negative transition of SB 203 as a Send Broadcast condition, |
# |
Description |
Turns ON when: |
Turns OFF when: |
Reset by: |
SB 217 |
SD Card Present |
An SD Card is in the slot, and is formatted to FAT32 |
SD Card is not found, or is incorrectly formatted |
OS |
SB 218 |
SD Card Write Enabled |
Write is enabled: the card's write-protect lock is off |
Write is disabled: the card's write-protect lock is on |
OS |
SB 219 |
SD FIFO Empty (SD Card may be Ejected) |
|
There are no SD requests pending, such as Data Table Copy/Log, Alarms, or from Info Mode |
OS |
SB# |
Description |
Turns ON when: |
Turns OFF when: |
Reset by: |
SB 240 |
CANopen: Configuration downloaded |
The CANopen Configuration FB is downloaded to the PLC |
No CANopen Configuration is present |
PLC |
SB 241 |
CANopen: Configured |
CANopen Configuration was successful |
CANopen Configuration failed |
PLC |
SB 242 |
CANopen: SDO in Progress |
SDO is busy transferring data |
SDO is not in progress |
PLC |
SB 243 |
CANopen: SDO transfer failed |
SDO data transfer fails |
SDO transfer begins |
PLC |
# |
Description |
Turns ON when: |
Turns OFF when: |
Reset by: |
SB 249 |
Black Background. (Relevant for Enhanced Vision only) |
By user. |
By user. |
By user. |
To learn how to use these operands to communicate data, check the topic Limit Keypad Entry. |
||||
# |
Description |
Turns ON when: |
Turns OFF when: |
Reset by: |
SB 250 |
Keypad entry within limits |
Turns ON for one scan when the entered value is within the Min/Max limits set in the variable's parameters. |
• The current Display is either re-called or changed, or • At the beginning of the next program cycle. |
|
SB 251 |
Keypad entry exceeds limits |
Is ON when the entered value is within the Min/Max limits. Note ♦ When this SB is ON, the blinking cursor remains on the active variable even after the user presses Enter.. |
• The current Display is either re-called or changed, or • At the beginning of the next program cycle. |
|
These SBs relate only to the EX-RC1 I/O expansion adapter. |
||||
# |
Description |
Turns ON when: |
Turns OFF when: |
|
SB 252 |
EX-RC1, Control Bus COMM LED |
Controlled by user. SB 252 controls the green LED Bus COMM on the EX-RC1 |
By user |
|
SB 253 |
EX-RC1 - I/Os COM Error |
Turns ON at communication failure between EX-RC1 – I/Os |
When communication is established between EX-RC1 – I/Os |
|
SB 254 |
EX-RC1: Reset all outputs |
Turn SB ON to reset all outputs. Controlled by user. |
By user |
|
# |
Description |
Turns ON when: |
Turns OFF when: |
Reset by: |
SB 279 |
Send SMS messages in ASCII format |
User Program Should be turned ON at power-up, before Com Init. |
User Program |
User Program |
# |
Description |
Turns ON when: |
Turns OFF when: |
Reset by: |
SB 280 |
Force Message Display on Cell Phone
|
User Program Should be turned ON at power-up, before Com Init. |
User Program |
User Program |
Use a Negative Transition contact of the appropriate SB as a Send condition.
# |
Description |
Turns ON when: |
Turns OFF when: |
Reset by: |
SB 284 |
Send PDO1 |
Buffer is full: SI 212 =8 |
Number of messages in buffer is less than maximum |
PLC |
SB 285 |
Send PDO2 |
Buffer is full: SI 213 =8 |
||
SB 286 |
Send PDO3 |
Buffer is full: SI 214 =8 |
||
SB 287 |
Send PDO4 |
Buffer is full: SI 215 =8 |
||
SB 288 |
RTR PDO1 |
Buffer is full: SI 216 =12 |
||
SB 289 |
RTR PDO2 |
Buffer is full: SI 217 =12 |
||
SB 290 |
RTR PDO3 |
Buffer is full: SI 218 =12 |
||
SB 291 |
RTR PDO4 |
Buffer is full: SI 219 =12 |
||
SB 292 |
Send NMT MC |
Buffer is full: SI 221 =8 |
||
SB 293 |
Send RTR NMT |
Buffer is full: SI 222 =12 |
# |
Description |
Turns ON when: |
Turns OFF when: |
Reset by: |
SB 300 |
Reset PLC Note that SB24 performs Reset + Init. |
By program or Remote Access |
Reset is run |
OS |
# |
Description |
Turns ON when: |
Turns OFF when: |
Reset by: |
SB 303 |
Backup Security in Memory (values stored for SB 314 Block PC access to PLC, SI[253] Info Password value, SI [50] Info Mode press time) |
By program or Remote Access |
Reset is run |
OS |
# |
Description |
Turns ON when: |
Turns OFF when: |
Reset by: |
SB 310 |
Buzzer |
By user |
By user |
User |
SB 311 |
Buzzer
- Screen Touch |
By user, ON by default in V290/280 |
By user |
User |
# |
Description |
Turns ON when: |
Turns OFF when: |
Reset by: |
SB 314 |
Blocks PC access to PLC (VisiLogic, RA, etc. ) |
By user |
By user (Default) |
User |
SB 324 |
SD: Open File (Read to SD) |
When Ladder function SD File: Open successfully activates a file for Read |
When Ladder function SD File: Close finishes closing an open file and SB 327 (EOF) turns ON |
OS. At Power-up and at SD File: Close |
SB 325 |
SD File: Read Chunk in Progress (a Chunk is 512 bytes long) |
When the Ladder function SD: Get Next File Chunk is reading a chunk into a vector |
When the Ladder function SD: Get Next File Chunk has finished reading the chunk |
OS. At Power-up |
SB 326 |
SD Read File: End Of File (EOF, entire file has been read) |
When the When the Ladder function SD: Get Next File Chunk reads the final Chunk |
When the last chunk has been read, and when Ladder function SD File: Close start |
OS. At Power-up and at SD File: Close |
SB 327 |
SD: Open File (Write to SD) |
When Ladder function SD File: Open successfully activates a file for Write on a SD card |
|
|
SB 328 |
SD File: Write Chunk in Progress (a Chunk is 512 bytes long) |
When the Ladder function SD: Get Next File Chunk is writing a chunk into a vector |
|
|
SB329 |
SD Write File: End Of File (EOF, entire file has been read) |
When the When the Ladder function SD: Get Next File Chunk writes the final Chunk |
|
|
Each COM port is linked to an SB that monitors communication signal breaks. Note |
||||
# |
Description |
Turns ON when: |
Turns OFF when: |
Reset by: |
SB 330 |
Break from External Device, COM Port 1 |
PLC receives break from external device |
PLC has finished processing tasks related to break. If no messages are received after the break, the PLC resets the SB after 5 seconds. Each message received causes the PLC to wait for 40 seconds before resetting the SB. |
OS |
SB 331 |
Break from External Device, COM Port 1 |
|||
SB 332 |
Break from External Device, COM Port 1 |
Each COM port is linked to an SB indicating GPRS communication status. These can be used as a condition to sending new messages. |
||||
# |
Description |
Turns ON when: |
Turns OFF when: |
Reset by: |
SB 334 |
GPRS 'Active': COM Port 1 |
Port is transmitting or receiving GPRS signals |
Port is free |
OS |
SB 335 |
GPRS 'Active': COM Port 2 |
|||
SB 336 |
GPRS 'Active': COM Port 3 |
# |
Description |
Turns ON when: |
Turns OFF when: |
Reset by: |
SB 340 |
Log to SD in Progress |
Row is being copied from DT to SD Card |
When copy is complete |
OS |
SB 341 |
Copy Data Table from PLC to SD in Progress |
Entire Data Table is being copied from DT to SD Card |
When the Write process is complete |
OS |
SB 342 |
Copy Data Table from SD to PLC in Progress |
Entire Data Table is being copied from SD Card to DT |
When the Write process is complete |
|
SB 340 |
Log to SD in Progress |
Row is being copied from DT to SD Card |
When copy is complete |
OS |
SB 341 |
Write Data Table from PLC to SD in Progress |
Entire Data Table is being copied from DT to SD Card |
When the Write process is complete |
OS |
SB 342 |
Read Data Table from SD to PLC in Progress |
Entire Data Table is being copied from SD Card to DT |
When the Write process is complete |
OS |
SB 343 |
File Report in Progress |
While Report process is in progress |
When the Report is complete |
OS |
SB 344 |
Write delimited line to SD in Progress |
While line is being written |
When the Write process is complete |
OS |
SB 345 |
email: Send in Progress |
Use to avoid communication conflicts and ensure that the e-mail function is free before sending an e-mail |
Turns ON when the e-mail function is activated. Turns OFF when the message has been sent to the server. |
OS |
SB 346 |
SD Data Block 0 Busy |
When a Write or Read utility is being run on a Data Block |
When no utility is running |
OS |
SB 347 |
SD Data Block 1 Busy |
|||
SB 348 |
SD Data Block 2 Busy |
|||
SB 349 |
SD Data Block 3 Busy |
# |
Description |
Turns ON when: |
Turns OFF when: |
Reset by: |
SB 352 |
SD: Enable writing Alarm History to SD |
Turned ON by user. Causes the PLC to write entire Alarm History to the SD Card |
Off by default. PLC stores Alarm History to memory. |
At Power-up, or by user |
SB 358 |
SD: Delete File in Progress |
ON when function is busy |
OFF when function is not busy |
OS |
SB 359 |
SD: File Info function in Progress |
ON when function is busy |
OFF when function is not busy |
OS |
SB 366 |
SD Clone in Progress |
Turns ON when a Clone file is being created OR installed |
Turns OFF : • When Cloning process is complete • Power up • SB 217 SD Card Present turns ON |
OS |
# |
Description |
Turns ON when: |
Turns OFF when: |
Reset by: |
SB 500 |
User RAM overlap warning |
When the application requests more memory than the PLC currently has free:
|
Requirements fall with memory capacity |
|
# |
Description |
Turns ON when: |
Turns OFF when: |
Reset by: |
SB 399 |
Ladder utility failure |
A Ladder utility fails to function. When SB399 is ON, the number of the failed utility is found in SI 26 |
At Power-up |
User Program |
# |
Description |
Turns ON when: |
Turns OFF when: |
Reset by: |
SB 501 |
Retain Inputs Forced Value after power failure Set SB 501at power-up to retain the state of inputs that are forced to 0 or 1 when the power is turned off. Reset SB 501at power-up to initialize forced inputs |
By User |
By User |
User, or when PLC is initialized |
# |
Description |
Value |
Comments |
SI 0 |
Scan Time, Resolution: Units of 1 mSec |
Updated by the controller at the end of every scan. |
A scan is a complete execution of the controller's entire program: reading inputs, executing the Ladder program, updating the outputs, running the HMI program,and processing communications. Scan time depends on the size and complexity of the application. Check the topic Program Sequencing: Modules, Subroutines, Labels & Jumps. |
SI 6 |
Current key pressed |
|
|
SI 7 |
LCD Contrast Control |
0=Minimal Contrast 50=Medium Contrast 100=Maximal Contrast |
Relevant for V120, V130, V280, V290. LCD contrast is set for V230, V260 via potentiometer. |
SI 8 |
Unit ID (Network) |
The ID # 1 is assigned by default. |
To learn how to use this operand, check the topic Assigning a Unit ID number |
SI 9 |
LCD Backlight intensity |
0 - 0ff 1 - On (low intensity) (V230 only) 2 - On (max. intensity) - Default |
Note that this is relevant for CSTN displays only. |
SI 14 |
Current controller temperature (not supported by V120/130/350) |
|
|
# |
Description |
Value |
Comments |
26 |
Ladder Utility Failure Indication |
Check table below |
When SB 399 is ON, and any Ladder utility fails, SI 26 contains the utility number. Any time a utility fails, SI 26 is overwritten. Note that resetting SB 399 initializes SI 26. |
Function |
Value |
Math: Linearization |
1 |
Math: Factor |
2 |
Vector: Fill |
3 |
Logic: Shift Right |
4 |
Logic: Shift Left |
5 |
Logic: Rotate Right |
6 |
Logic: Rotate Left |
7 |
Vector: Bit to Numeric |
8 |
Vector: Numeric to Bit |
9 |
the function Config |
10 |
Math: Power |
11 |
Math: Square Root |
12 |
Vector: Get Minimum (value in vector) |
13 |
Vector: Get Maximum (value in vector) |
14 |
Vector: Find Bit (in vector) |
15 |
Vector: Copy |
16 |
COM: Init function |
17 |
Logic: Test Bit (in vector) |
18 |
Logic: Set Bit (in vector) |
19 |
Logic: Reset Bit (in vector) |
20 |
Vector: Load |
21 |
Vector: Store |
22 |
Vector: Compare |
23 |
Vector: Compare (Offset) |
24 |
Vector: Copy (Offset) |
25 |
Vector: Fill (Offset) |
26 |
Data Tables: Read |
27 |
Data Tables: Write |
28 |
Data Tables: Read Line |
29 |
Data Tables: Write Line |
30 |
HMI: Display Loaded |
31 |
HMI: Load Last HMI Display |
32 |
/*EthernetUtils.OnlyfortheV200Series*/ |
|
TCP/IP COM Init |
33 |
TCP/IP Socket Init |
34 |
Connect: TCP |
35 |
Close: TCP |
36 |
Math: Float Trig SIN |
37 |
Math: Float Trig COS |
38 |
Math: Float Trig TAN |
39 |
Math: Float Trig ASIN |
40 |
Math: Float Trig ACOS |
41 |
Math: Float Trig ATAN |
42 |
Math: Float Extended EXP |
43 |
Math: Float Extended LN |
44 |
Math: Float Extended LOG10 |
45 |
Math: Float Extended Power |
46 |
Math: Float Extended Square root |
47 |
Math: Float Basic Add |
48 |
Math: Float Basic Subtract |
49 |
Math: Float Basic Multiply |
50 |
Math: Float Basic Divide |
51 |
|
|
Math: Float Convert A+B/n |
52 |
Math: Float Convert A+B/n (decimal) |
53 |
Math: Float Convert Inverse (A+B/n) |
54 |
Math: Float Convert Inverse (A+B/n) (decimal) |
55 |
Math: Float Basic ABS |
56 |
Math: Float Trig Degrees |
57 |
Math: Float Trig Radians |
58 |
Math: Float Compare Greater Than |
59 |
Math: Float Compare Greater Equal |
60 |
Math: Float Compare Equal |
61 |
Math: Float Compare Not Equal |
62 |
Math: Float Compare Less Than |
63 |
Math: Float Compare Less than Equal |
64 |
Float Store |
65 |
COM: Dial |
66 |
COM: Hangup |
67 |
Strings: Transpose |
68 |
Vector: Copy Memory |
70 |
Strings: Num to ASCII |
71 |
HMI: Draw Pixel |
73 |
HMI: Draw Line |
74 |
Logic: RS FlipFlop |
75 |
Logic: SR FlipFlop |
76 |
Time To ASCII |
77 |
Clear Table Row column, Clear All DB |
78 |
Online Point |
79 |
Vector: Shift |
80 |
Data Table: Find |
81 |
Math: Float Compare In Range |
82 |
Vector:Load Timer Scan Bit |
83 |
|
|
More: Immediate Read Physical Input |
84 |
Immediate: Write to Physical Output Digital or Analog |
85 |
More: Immediate Update Physical High-speed Input |
86 |
|
|
Strings: IP to ASCII |
87 |
COM: Set PLC Name |
88 |
Data Table: Find Extended |
89 |
HMI: Clear Rectangle |
90 |
More: Debug Interval Start |
91 |
More: Debug Interval End |
92 |
Strings: Time to ASCII |
93 |
Store: Num to BCD |
94 |
Store: BDC to Num |
95 |
Clock: RTC to UTC |
96 |
Clock: UTC to RTC |
97 |
|
|
Math: Linearize Vector |
98 |
|
|
Data Table: Read Line |
99 |
Data Table: Write Line |
100 |
Immediate: Write to Physical Analog Output |
101 |
Com TCP/IP RFC 1305 |
102 |
Math: Formula |
103 |
|
|
String: ASCII to Num |
104 |
Data Table: Copy Row |
105 |
Data Table: Copy Column |
106 |
Strings: MAC Address to ASCII |
107 |
Vector: Struct |
108 |
Com: Send UniCAN |
109 |
Data Table: Clear Row |
110 |
Data Table: Clear Column |
111 |
Com: UniCAN Check Alive |
112 |
Com: UniCAN Broadcast |
113 |
Vector: Swap Bytes |
114 |
Com: UniCAN Message Arrived |
115 |
Logic: RLO to Bit |
117 |
Vector: Sort |
118 |
Com: CANopen Configuration |
119 |
Com: CANopen Send PDO |
120 |
Com: CANopen Send RTR PDO |
121 |
Com: CANopen Send SDO |
122 |
Com: CANopen Send NMT Control |
123 |
Com: CANopen Send NMT Node Guard |
124 |
Com: CANopen Send Synch |
125 |
Com: CANopen |
126 |
Com: CANopen Send Download STR |
127 |
Com: CANopen Send Upload STR |
128 |
Vector: String Length |
129 |
HMI: Is HMI Last Displayed |
130 |
Com: TCP Send RAW UDP |
131 |
Com: TCP Receive RAW UDP |
132 |
Com: CAN Layer 2 Send |
133 |
Com: CAN Layer 2 Receive |
134 |
|
|
Last Call Received |
I o135 |
More: Idle |
136 |
|
|
Alarms: Show Groups |
137 |
Alarms: Show Alarms |
138 |
|
|
Strings: Set String Library |
139 |
|
|
Strings: Timer to ASCII |
140 |
Strings: Lib.Str. to ASCII |
141 |
Vector: Toggle Bit in Vector |
142 |
Vector: Toggle Bit in Vector |
143 |
Step In Range |
144 |
Strings to ASCII |
145 |
Strings: to NUM |
145 |
Strings: remove |
146 |
Strings: insert |
147 |
Strings: left |
148 |
Strings: right |
149 |
Strings: middle |
150 |
Strings: find_in_str |
151 |
COM: Set PLC Network ID |
152 |
Strings: Timer to ASCII |
153 |
HMI: Refresh HMI Display |
154 |
Data Tables: Read/Write Column |
155 |
Reserved |
156 |
SD: Write DT to SD .udt |
158 |
SD: Log DT row to SD |
159 |
160 |
|
Alarms: Clear History Buffer |
161 |
COM: Send TCP RAW |
162 |
COM: Scan TCP RAW |
163 |
SD: Set SD Password |
164 |
String: Replace STR A with STR B |
165 |
SD: Save Trend to SD |
166 |
SD: Stop Trend to SD |
167 |
SD: Read from .udt SD to DT |
168 |
Immediate: Frequency Measurement based on HSC |
169 |
Reserved |
170 |
Immediate: Stop Frequency Measurer |
171 |
Immediate: Reset HSC |
172 |
COM: CANopen: Map register bytes |
173 |
SD: Read SD.udt to Data Table |
174 |
CAN J1939: Config |
175 |
CAN J1939: Activate cyclic send |
177 |
CAN J1939: Send pgn |
178 |
Data Tables: Read row |
179 |
Data Tables: Write row |
180 |
COM: TCP/IP: Ping |
181 |
SD: Read SD Block (udb) to Operand Vector |
182 |
SD: Write from Operand Vector to SD Block (udb) |
183 |
SD: Create Block |
184 |
SD: File Read: Open |
185 |
S SD: File Read: Next Chunk |
186 |
SD: File Read: Close |
187 |
CAN J1939: Request PGN Data |
188 |
COM: Df1 Scan |
189 |
COM: SNMP Trap |
190 |
SD: Create Delimited Line |
191 |
SD Write: open file |
192 |
SD Write: read file |
193 |
SD Write: close file |
194 |
SD: Write Delimited Line |
195 |
SD Folder Report: Number of Files |
196 |
SD File: Delete file |
197 |
SD: Write DT to SD .udt |
198 |
SD: Log DT row to SD |
199 |
SD Files: File Info |
200 |
SD Data Tables: Search .udt for key |
201 |
COM: Telegram parser |
202 |
COM: CANLayer2 ScanEx |
203 |
COM: Set SNMP community name |
204 |
Backup security operands |
205 |
SD: Safely Remove |
206 |
SD: Clone |
207 |
COM: DNS Resolver |
208 |
Data Tables: Delete Rows |
209 |
SD: Rename SD File |
210 |
# |
Description |
Value |
Comments |
SI 30 |
Current second |
0-59 |
According to RTC |
SI 31 |
Current time |
24 hour clock: 14:59 = 1459 |
|
SI 32 |
Current date |
12/07 = 12th of July |
|
SI 33 |
Current year |
2007=2007 |
|
SI 34 |
Current day of week |
1-7 |
|
SI 35 |
Current hour |
0-23 |
|
SI 36 |
Current minute |
0-59 |
|
SI 37 |
Current day of month |
30 = 30th day of month |
|
SI 36 |
Current Month |
1-12, where 1 corresponds to January. |
# |
Description |
Value |
Comments |
SI 40 |
Touchscreen is being touched- X coordinates |
If the screen is touched, SI 40 shows the current location on the X axis. |
When the screen is not touched, SI 40 = -1 |
SI 41 |
Touchscreen is being touched-Y coordinates |
If the screen is touched, SI 41 shows the current location on the Y axis. |
When the screen is not touched, SI 41 = -1 |
# |
Description |
Value |
Comments |
SI 42 |
Active Keypad Entry variable |
Number of currently active variable |
You can write a number to activate a different variable |
# |
Description |
Value |
Comments |
SI 45 |
Numeric Key Entry Out of Limit - Counter of Attempts |
Counts the number of failed attempts to enter a value, such as a password |
Enhanced Vision only If a Legal Entry bit is defined, SB 94 does not turn ON if the entered value is out of range. The keypad stays on screen until a legal value is entered. You can use SI 45 in conjunction with a Compare function to exit the variable. |
# |
Description |
Value |
Comments |
SI 46 |
Refresh HMI Buttons, Frame, Text |
Units 10 msec, redraws these items in current display to reflect changes |
|
# |
Description |
Value |
Comments |
SI 49 |
Select Touch Keyboard Type |
0, 1, 257 |
See the topic Vision Controller Divisions, Special Issues, Virtual Keypads: Enhanced Touchscreen Models |
# |
Description |
Value |
Comments |
SI 50 |
INFO delay time |
Default by O/S (every power up) = 4 seconds |
|
SI 51 |
Info Mode, Serial COM Monitor: # of messages not displayed |
Number of messages not displayed. Initialized every time the Monitor is entered |
When entering the monitor, the display must synchronize with the actual messages in real time. This SI contains the number of messages that are not displayed before synchronization is complete. |
# |
Description |
Value |
Comments |
SI 58 |
email: Limit File Attachment Size |
1=1024 bytes |
Note that the file size must not be changed while the Send is in Progress. |
# |
Description |
Value |
Comments |
SI 59 |
Send e-mail: Increase Timeout |
resolution=10 ms |
In some applications, such as those relying on slower cellular routers, the Send e-mail process may require added time. Use this to add that time. |
# |
Description |
Value |
Comments |
SI 63 |
Maximum number of Trend files that can be saved (read-only) |
0-64 The maximum amount of Trend files (*.udt files) in a single folder is 64. The value in SI 63 shows the number of remaining *.utr files; if 5 *.utrt files exist, SI 64 = 59 |
|
SI 64 |
Maximum number of DT files that can be saved (read-only) |
0-64 The maximum amount of Trend files (*.udt files) in a single folder is 64. The value in SI 64 shows the number of remaining *.udt files; if 5 *udt files exist, SI 64 = 59 |
|
# |
Description |
Value |
Comments |
SI 66 |
SD Card Status Messages |
This SI is a bitmap; a bit turns ON to indicate status.
|
|
# |
Description |
Value |
Comments |
SI 67 |
SD Card, Read Files: Status |
Value 0= No error 1= No SD card in Slot 2= Vector is not long enough to contain data (may be at upper address limit of that data type) 3= Path to SD file not found 4=Another file is currently open 5 = File is closed 6 = Busy: previous request in progress 7 = File Open Error 8 = Read Error 9 = File Close error |
SI 67 reports status for the following SD File utilities:
|
SI 68 |
SD Card, Write Files: Status |
Value 0 = No error 1 = No SD card in Slot 2 = Vector is not long enough to contain data (may be at upper address limit of that data type) 3 = Path to SD file not found 4 = Another file is currently open 5 = File is closed 6 = File Open error 7 = Write Error 14 = File Close error |
SI 68 reports status for the following SD File utilities:
|
# |
Description |
Value |
Comments |
SI 69 |
SD Card: File Open Time (may signal file fragmentation) |
Time required to open SD files, in units of 10mSec. |
Each time a file is opened, the OS updates this value. A typical first write (open + write) =approx. 500mSec, typical first read (open + read)= approx. 60mSec
Over time, this may increase due to file fragmentation.
If the time becomes to great, the card should be reformatted Reset at Power-up and when SD card is removed. |
# |
Description |
Value |
Comments |
SI 160 |
SD Trend 1 status |
This SI is a bitmap; a bit turns ON to indicate status when the function Start Saving Trend to SD runs.
|
|
SI 161 |
SD Trend 2 status |
||
SI 162 |
SD Trend 3 status |
||
SI 163 |
SD Trend 4 status |
||
SI 164 |
SD Trend 5 status |
||
SI 165 |
SD Trend 6 status |
||
SI 166 |
SD Trend 7 status |
||
SI 167 |
SD Trend 8 status |
# |
Description |
Value |
Comments |
SI 330 |
SD: Write DT from PLC to SD - Total Amount of Data to be Copied (blocks of 512 bytes) |
When the application runs the function Copy Data Table to SD, SI 330 shows the total number of blocks of data to be copied from the PLC. |
Initialized at Power-up |
SI 331 |
SD: Write DT from PLC to SD - Remaining Amount (blocks not yet copied) |
Shows how many blocks of data remain to be copied. The value increases by 1 each time a block is copied. |
Initialized:
|
SI 332 |
SD: Read DT SD to PLC - Total Amount of Data to be Copied (blocks of 512 bytes) |
When the application runs the function Copy Data Table to PLC, SI 332 shows the total number of blocks of data to be copied from the SD. |
Initialized at Power-up |
SI 333 |
SD: Read DT from SD to PLC - Remaining Amount (blocks not yet copied) |
Shows how many blocks of data remain to be copied. The value increases by 1 each time a block is copied. |
Initialized:
|
# |
Description |
Value |
Comments |
SI 72 |
FLASH Storage Bitmap (V570, 290-C) |
A bit is on when data is present Bit 0 = Data backup from RAM to FLASH Bit 1 = Upload data (.vlp in PLC can be uploaded) Bit 2-7 = Internal Bits 8-15 = String storage The SI is updated by the OS after every download. |
FLASH informations is divided into sections. The status the bits shows if data is stored in these sections.
Relevant to V570, V290-C. |
# |
Description |
Value |
Comments |
SI 74 |
Alarms Utility, General Status |
A bit is on when data is present Initialized at power-up Bit 0 = Alarm Version in OS does not match VisiLogic version Bit 1 = No Alarms defined Bit 2 = Internal error Bit 8 = History buffer full |
|
# |
Description |
Value |
Comments |
SI 75 |
Operand assignment error |
0 = no error Any other value = Error |
Number of functions assigned operands that are of illegal address or type. Relevant to V570, V290-C. |
# |
Description |
Value |
Comments |
SI 76 |
Number of Alarms currently in History Buffer |
Shows the number of Alarms in the PLC memory buffer |
|
Each COM Port is linked to 2 SIs; their values and messages are indicated below. |
||||||||||||||||||||||||||||||||||||||||||||||||||||||||||||||||||||||
SI 80 |
Modem Status: COM 1 |
|
||||||||||||||||||||||||||||||||||||||||||||||||||||||||||||||||||||
SI 81 |
Error Code: COM 1 |
|||||||||||||||||||||||||||||||||||||||||||||||||||||||||||||||||||||
SI 82 |
Modem Status: COM 2 |
|||||||||||||||||||||||||||||||||||||||||||||||||||||||||||||||||||||
SI 83 |
Error Code: COM 2 |
|||||||||||||||||||||||||||||||||||||||||||||||||||||||||||||||||||||
SI 84 |
Modem Status: COM 3 |
|||||||||||||||||||||||||||||||||||||||||||||||||||||||||||||||||||||
SI 85 |
Error Code: COM 3 |
SI |
Description |
Value |
100 |
Maximum Time Delay between characters (units 2.5ms) MODBUS + Modem |
When MODBUS (Serial) is configured, the MODBUS function checks SI 100. If SI 100 = 1, a time interval of up to 2.5 msecs is permitted between characters, if SI 100 contains 2, the permitted interval is 5 msecs ( n x 2.5 =interval). Note that: |
Note ♦ |
The Vision700 controller series comprises a built in Ethernet port, and many of the Ethernet system operands listed below do not apply to the V700. Please check the topic Vision700 - Using Ethernet for complete information. |
# |
Description |
Value |
Comments |
SI 101 |
TCP/IP retries base time out |
|
|
SI 102 |
Retries count |
|
|
SI 103 |
TCP/IP Connection Keep Alive (Socket 0) |
Units of 100 msec Note- When value is ‘0’, the function is disabled |
Enables the PLC to disconnect if there is no communication from the connected device.
|
SI 104 |
TCP/IP Connection Keep Alive (Socket 1) |
||
SI 105 |
TCP/IP Connection Keep Alive (Socket 2) |
||
SI 106 |
TCP/IP Connection Keep Alive (Socket 3) |
||
SI 107 |
TCP/IP Keep Client (Master) Connection (Socket 0) |
Units of 100 msec Note- When value is ‘0’, the function is disabled |
Enables the PLC to reconnect the connect when there is no communication from the connected device for the defined time.
|
SI 108 |
TCP/IP Keep Client (Master)Connection (Socket 1) |
||
SI 109 |
TCP/IP Keep Client (Master)Connection (Socket 2) |
||
SI 110 |
TCP/IP Keep Client (Master)Connection (Socket 3) |
||
SI 140 |
Ethernet Send has failed, per socket ( bitmap) |
Bit is ON when Send is not successful |
Bitmap: | UDP S3 | UDP S2 | UDP S1 | UDP S0 | TCP S3 | TCP S2 | TCP S1 | TCP S0 | |
SI 141 |
Ethernet Socket 0: Protocol Type |
|
(Read-only) Sockets are set to Protocol Type 0 by default. Activating MODBUS Configuration changes the Protocol Type to 1. |
SI 142 |
Ethernet Socket 1: Protocol Type |
||
SI 143 |
Ethernet Socket 2: Protocol Type |
||
SI 144 |
Ethernet Socket 3: Protocol Type |
Parameter |
Function |
SI Value |
Message |
S1 145 |
Socket 0: Status |
0 |
Initialized to UDP, status: Closed |
SI 146 |
Socket 1: Status |
2 |
Initialized to TCP, status: Listen |
SI 147 |
Socket 2: Status |
14 |
Initialized to UDP, status: Ready |
SI 148 |
Socket 3: Status |
15 |
Initialized to UDP, status: Engaged in Transmit/Receive |
# |
Description |
Value |
Comments |
SI 184 |
Installed Com Port |
Indicates which port is installed: 0-none, 1-serial, 2-eth,4-profibus |
SI |
Description |
Value |
185 |
GSM Signal Quality (V120/230/260/280/290-BW) |
|
188 |
GSM Signal Quality COM2 (V570, 290-C) |
|
191 |
GSM Signal Quality COM3 (V570, 290-C) |
Use these together with SB 198 and 199 to write incoming SMS messages to a vector of operands. This does not affect the function of the SMS message function blocks. |
|||
SI# |
Description |
Value |
Comments |
SI 198 |
Received SMS Message Length |
Shows the length of the message in bytes |
The data remains until the vector is overwritten |
SI 199 |
SMS to Memory Vector - start of vector |
The SMS message data is written starting from this address |
To write to a vector of XIs, enter a negative value) |
The function of some operands depends on whether the CANbus network is defined as CANbus ISC, CANopen or UniCAN.
SI# |
Description |
Value |
Comments |
||||||||||||||||||||||||||||||||||||||||||||||||||
SI 211 |
CANopen: Number of received messages |
Shows the number of received messages in the Receive buffer (except for SDOs) |
Maximum number of messages=128 |
||||||||||||||||||||||||||||||||||||||||||||||||||
SI 212 |
CANopen: Number of Send PDO1 |
Shows the number of PDO1 messages currently in the PDO1 Send buffer |
|
||||||||||||||||||||||||||||||||||||||||||||||||||
SI 213 |
CANopen: Number of Send PDO2 |
Shows the number of PDO2 messages currently in the PDO2 Send buffer |
|
||||||||||||||||||||||||||||||||||||||||||||||||||
SI 214 |
CANopen: Number of Send PDO3 |
Shows the number of PDO3 messages currently in the PDO3 Send buffer |
|
||||||||||||||||||||||||||||||||||||||||||||||||||
SI 215 |
CANopen: Number of Send PDO4 |
Shows the number of PDO4 messages currently in the PDO4 Send buffer |
|
||||||||||||||||||||||||||||||||||||||||||||||||||
SI 216 |
CANopen: Number of Send RTR PDO1 |
Shows the number of RTR PDO1 messages currently in the PDO1 Send buffer |
|
||||||||||||||||||||||||||||||||||||||||||||||||||
SI 217 |
CANopen: Number of Send RTR PDO2 |
Shows the number of RTR PDO2 messages currently in the PDO2 Send buffer |
|
||||||||||||||||||||||||||||||||||||||||||||||||||
SI 218 |
CANopen: Number of Send RTR PDO3 |
Shows the number of RTR PDO3 messages currently in the PDO3 Send buffer |
|
||||||||||||||||||||||||||||||||||||||||||||||||||
SI 219 |
CANopen: Number of Send RTR PDO4 |
Shows the number of RTR PDO4 messages currently in the PDO4 Send buffer |
|
||||||||||||||||||||||||||||||||||||||||||||||||||
SI 220 |
CANopen: Number of Send SDOs |
Shows the number of SDO messages currently in the Send buffer |
|
||||||||||||||||||||||||||||||||||||||||||||||||||
SI 221 |
CANopen: Number of Send NMTs |
Shows the number of NMT module control messages currently in the NMT Send buffer |
|
||||||||||||||||||||||||||||||||||||||||||||||||||
SI 222 |
CANopen: Number of Send RTR NMTs |
Shows the number of RTR NMT messages currently in the Send buffer |
|
||||||||||||||||||||||||||||||||||||||||||||||||||
SI 223 |
CANopen: Send Buffer full (per type) |
The bits in this register represent the different Send buffers (except for SDOs) |
Maximum number of messages per buffer=8 |
||||||||||||||||||||||||||||||||||||||||||||||||||
When a bit is ON, the corresponding buffer is full. High byte:| - | - | - | - | - | - | -| NMT mc | Low byte: | PDO | -| RCV NMT | RCV PDO4| RCV PDO3 | RCV PDO2 | RCV PDO1 | RCV Emergency | |
|||||||||||||||||||||||||||||||||||||||||||||||||||||
|
|||||||||||||||||||||||||||||||||||||||||||||||||||||
SI 224 |
CANopen: Number of received SDO messages |
Shows the number of received SDOs currently in the Receive buffer |
|
||||||||||||||||||||||||||||||||||||||||||||||||||
SI 225 |
CANopen: SDO status |
The status codes are given below. |
|
||||||||||||||||||||||||||||||||||||||||||||||||||
|
|
SI 200 |
CANbus Network operand |
|
||||||||||
SI 201 |
CANbus Network operand |
|
||||||||||
SI 236 |
CANbus Network communication error code |
|
||||||||||
SI 237 |
CANbus Network: failed unit ID |
|
||||||||||
SI 240 |
SIs 240-243 comprise a bitmap indicating which unit is in error. If, for example, the network includes unit ID numbers 8, 9 and 13, and PLC #9 cannot be accessed, then the ninth bit in SI240 will turn ON. When the error is fixed, the bit falls to OFF |
|||||||||||
SI 241 |
||||||||||||
SI 242 |
||||||||||||
SI 243 |
SI# |
Description |
Comments |
200 |
When a UniCAN Broadcast message is received, SI 200 contains the ID number of the sending unit. |
The user must initialize these SIs |
201 |
When a UniCAN Broadcast message is received, SI 201 contains the value of the MI that is broadcast. |
|
202 |
Number of Send messages waiting in High Priority buffer |
Automatically updates |
203 |
Number of Send messages waiting in Low Priority buffer |
|
204 |
Number of Received messages waiting in buffer |
|
240 |
These provide a bitmap of controllers 1-60 in the UniCAN network. |
When the controller receives a message, the appropriate bit turns ON. These bits are reset by the Answer Received function. |
241 |
||
242 |
||
243 |
# |
Description |
Value |
Comments |
SI 205 |
Hardware Configurations |
Select the active configuration storing a value in SI 205. The application will run according to the selected Config without error. |
When
you store the value, the controller will reboot and will use
the selected hardware configuration. |
# |
Description |
Value |
Comments |
SI 244
|
V1040, X Coordinates, Num Keypad/Alarm screen |
Enter the X value to alter the location of these elements on the screen. |
Values remain until changed by user |
SI 445 |
V1040, Y Coordinates, Num Keypad/Alarm screen |
Enter the Y value to alter the location of these elements on the screen. |
Values remain until changed by user |
SI 246 |
(V1210/V1040 only) Improve Display of Complex HMI Element. 1- 30 |
If an HMI element shows many lines of text or contains other complex data, parts of the element might not be drawn on the HMI screen. To resolve this issue, you can start by entering 2 into SI 246 and then gradually increasing the value until the issue resolves. The maximum legal limit is 30. |
SI 249 |
Last Active Keypad Entry Variable |
Contains the ID number of the last active variable. |
SI 250 |
Currently active keypad entry, read/write |
Currently active keypad entry, read/write. When either SB 250' Keypad Entry Within Limits' or SB251 'Keypad Entry Exceeds Limits' turn ON, the index number of the variable is stored here. As you navigate between variables, as for example with the right-left arrow keys, SI 250 will show only the numbers of variables that have not been completed. Note ♦ A value of -1 indicates that, in this particular display, the user has pressed Enter for all the Keypad Entry variables in the Display. |
SI 251 |
Previous HMI Display Number |
|
SI 252 |
Current HMI Display Number |
To see a list of Displays in a project together with their Display numbers, select HMI Information from the View menu. |
SI 253 |
Password: Info Mode |
Note that at every power-up, the default password to Info Mode, 1111, is restored. To maintain a different password after power-up, use SB 2-Power-up as a condition to store the desired password value into SI 253. The password may also be modified by accessing the controller via VisiLogic, then running On-line Test mode and changing the value. This value will be erased at power-up. |
SI 274 |
COM1, Received Message Counter |
Counts received messages, increments after message is validated. Initialized by OS at power-up |
SI 275 |
COM2, Received Message Counter |
|
SI276 |
COM3, Received Message Counter |
Note ♦ |
These SIs record the number of packets received or transmitted per socket. They apply to all Ethernet communications. |
# |
Description |
Value |
Comments |
SI 301 - 308 |
Ethernet: Rx Packet Length |
|
The number of packets received per socket is stored in these integers as follows:
in controllers offering more than 4 sockets, such as V700
|
SI 311 - 308 |
Ethernet: Tx Packet Length |
|
The number of packets transmitted per socket is stored in these integers as follows:
in controllers offering more than 4 sockets, such as V700
|
SI 440 |
General Error SB 10 turns on when a Float Error occurs. |
|
SI 497 |
Firmware Build Number |
Contains the build number of the OS currently in the controller. (V120, V230, V260, V280, V290 BW) |
SI 498 |
Firmware Version Number |
Contains the version number of the OS currently in the controller.(V120, V230, V260, V280, V290 BW) |
SL 4 |
Divide Remainder (signed divide function) |
SL 47 |
0xDEADBEAF Erases ALL application sectors (fonts, DLUs, .vlp, String Library, Web Server) and forces restart. DEADBEAF causes the PLC to enter System mode while sectors are being erased. The process may take as long as 10 minutes; when it is complete, the PLC will restart. |
# |
Description |
Value |
Comments |
||
SDW 0 |
10mS counter |
|
|
||
SDW 2 |
SDW 2 Cycle Counter |
Increments by 1 every program cycle |
|
||
SDW 3 |
2.5 mS counter |
|
|
||
SDW 4 |
Divide Remainder |
|
Unsigned divide function |
||
SDW 5 |
Expansion module short circuit bitmap |
|
|
||
SDW 6 |
Snap-in module short circuit bitmap |
|
|
||
SDW 9 |
Unique PLC ID number (All Visions) |
Each PLC has its own unique ID number |
Use SDW9 (unique PLC number) to restrict a program to a particular PLC. |
||
SDW 10 |
Keypad entry variable value |
|
When a keypad entry variable value is entered, this SDW 10 holds the value. |
||
SDW 13 |
Phone number of last received SMS |
|
last 9 digits |
||
SDW 14 |
Socket 0: Number of sent transmissions |
Updated after each data transmission via Socket 0 |
|
||
SDW 15 |
Socket 1: Number of sent transmissions |
Updated after each data transmission via Socket 1 |
|
||
SDW 16 |
Socket 2: Number of sent transmissions |
Updated after each data transmission via Socket 2 |
|
||
SDW 17 |
Socket 3 : Number of sent transmissions |
Updated after each data transmission via Socket 3 |
|
||
SDW 18 |
Socket 0: Number of received transmissions |
Updated after each data packet received via Socket 0 |
|
||
SDW 19 |
Socket 1: Number of received transmissions |
Updated after each data packet received via Socket 1 |
|
||
SDW 20 |
Socket 2: Number of received transmissions |
Updated after each data packet received via Socket 2 |
|
||
SDW 21 |
Socket 3: Number of received transmissions |
Updated after each data packet received via Socket 3 |
|
||
SDWs that are common to UNICAN and CANopen change function, according to the CANbus type selected in the COM Init function. |
|||||
SDW 7 |
UniCAN, CANbus ISC Error |
If not 0, contact technical support |
|
||
SDW 56 |
UniCAN Send message counter |
Is initialized when CANbus Port Init runs, then increments at every UniCAN Send. |
Note that only messages sent from a UniCAN Send are counted |
||
SDW 57 |
UniCAN Receive message counter |
Is initialized when CANbus Port Init runs, then increments at every UniCAN Receive. |
Note that only messages received from a UniCAN Send are counted, not Broadcast messages or Check if Alive responses. |
||
SDW 30 |
Variable display bitmap, 0=Normal, 1=Inverse (or negative) |
The value is checked when a display is entered. It is initialized to 0: - At Power-up. - When the program exits the Display. |
When a bit is ON, the corresponding variable is displayed in inverted (negative) color; black pixels are changed to white and white to black. |
||
SDW 31 |
Hide Var |
The value is checked when a display is entered. It is initialized to 0 at: - Power-up. - When the program exits the Display. |
When a bit is ON, the corresponding variable is hidden |
||
|
|||||
SDW 37 |
MODBUS Slave: Receive Counter (Bitmap) |
Increments a 4-bit field each time a slave receives data |
High - >low: | Eth port 3| Eth port 2| Eth port 1| Eth port 0| |spare| | com 3| com 2| com 1| |
||
SDW 38 |
TCP/IP Keep Alive counter |
Increments a 8-bit field each time the O/S initializes the socket due to ‘Keep Alive’ (SI 103-106) |
| Eth port 3| Eth port 2| Eth port 1| Eth port 0| |
||
SDW 39 |
Ethernet general critical error |
8-bit counters |
Bits 24-31: "Ethernet card init” – if the MS Byte (xxx.yyy.zzz.kkk, MS means the xxx part) of the IP/ SUBNET/ GATEWAY is zero – do not init the Ethernet. Bits 16-23: Check once in second if local IP SUB and GATEWAY are ok. Cause set of SB 167. Bits 8-15: TCP (connect) & UDP (send) IP is defined – Read HW remote IP to verify. Case verifies failed: Ignore connect or send. Bits 0-7: While getting message from socket – if the high part of the remote IP high is zero. Cause set of SB 167 |
||
SDW 42 |
100mS Timer Counter, Stable |
Counts number of pulses |
Updates at beginning of program scan only |
||
SDW 43 |
10mS Timer Counter, Stable |
Counts number of pulses |
Updates at beginning of program scan only |
||
SDW 44 |
2.5mS Timer Counter, Stable |
Counts number of pulses |
Updates at beginning of program scan only |
||
SDW 45 |
TCP/IP Keep Client (Master) Connection |
Increments a 8-bit field each time the O/S initializes the socket due to ‘Keep Alive’ (SI 107-110) |
| Eth port 3| Eth port 2| Eth port 1| Eth port 0| |
||
SDW 49 |
Signature Log Checksum |
|
|
||
SDW 59 |
SD Card: Free space (bytes) |
Capacity given in 512-byte chunks. The value is written when SB 217 turns ON, and is updated at each write operation. The operand is reset when SB 217 turns OFF. |
Initialized at Power-up. |
||
SDW 60 |
Info Error Status |
Error Indication |
|
||
SDW 63 |
Firmware version and Build number |
Contains the version number of the OS currently in the controller |
Relevant for V570, V290 Color |
On-line Test (Remote Access) Mode, SI 86,88
These SIs enable the controller to send SMS messages when the controller is in On-line Test (Remote Access) mode. The SIs do not need to be used in the application because the process is transparent to the user.
SI |
Description |
86 |
Modem Connection Status: COM 1 |
87 |
Modem Connection Status: COM 2 |
88 |
Modem Connection Status: COM 3 |