Creating Projects
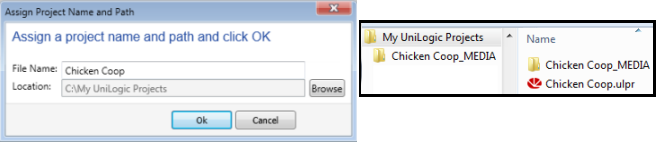
When you create a UniLogic project, you first select a project type, and then assign a project name and path. This is because HMI media files, which include images, sound, and video, are automatically stored by UniLogic in folders along this path.
On the ribbon, click the Project tab, and then select one of the following options:
UniLogic asks you to assign a file name and select a location; the application creates a _MEDIA folder and subfolders for audio and video files. When you include audio and video in your application, UniLogic stores the files in these folders.
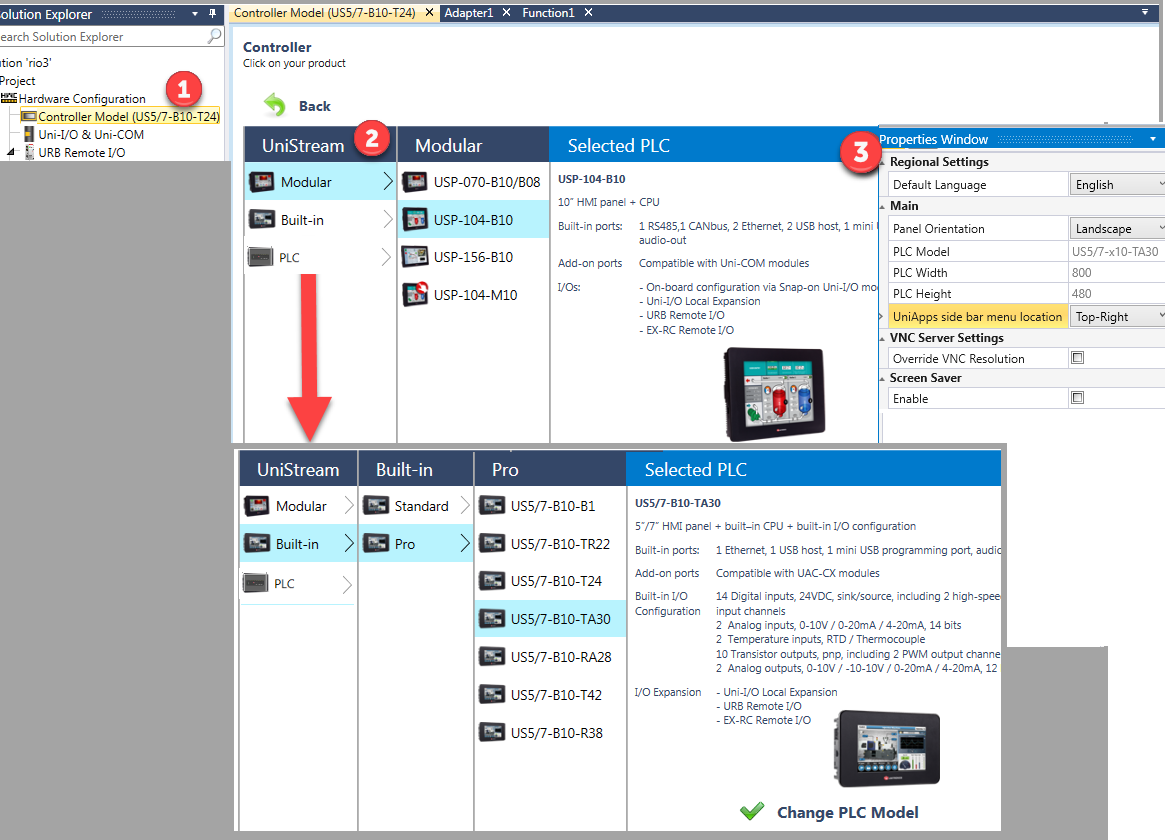
Select a controller:
-
In the Solution Explorer, click Controller family, Modular, Built-in, or PLC.
-
In the Controller Model window, click on your model to select it,
or
on the > arrow to open a controller category that contains additional models.
If you have selected:
- Built-in, click Standard or Pro to see the relevant models.
- PLC, click Standard, Pro, or Basic to see the relevant models
-
Use the Properties Window to set a Default Language and HMI display defaults. You can also change the location of the point of contact that an end-user uses to open UniApps, configure VNC Server settings, and enable screen saver options. as well as override VNC Resolution and enable screen saver options.
To change your selection at any time, click Change PLC Model at the bottom of the Controller Model window.
Note that the controller you select modifies the option that UniLogic presents for I/O and COM modules, and shows only the options that are relevant for your selected controller.
Automatic Firmware Availability Check
When creating a new project, UniLogic checks whether the required firmware for the selected PLC Model is available for download.
If not, UniLogic displays the following message, which includes directions for downloading the firmware.
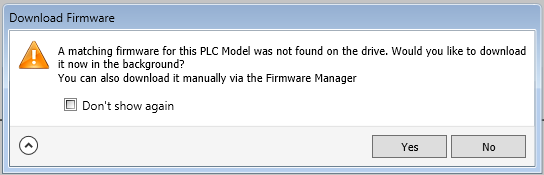
A firmware file is considered unavailable when the required PLC model firmware does not exist in the corresponding BIN version installed on the PC.
For information on downloading and managing firmware files, refer to Firmware Management.
Running Multiple Instances of UniLogic
You can open and run up to three projects of UniLogic, and Drag & Drop, or copy & paste Ladder elements and rungs from one open UniLogic project to another open project. Note that UniLogic automatically creates tags and structs as needed.
Ladder, Copy & Paste
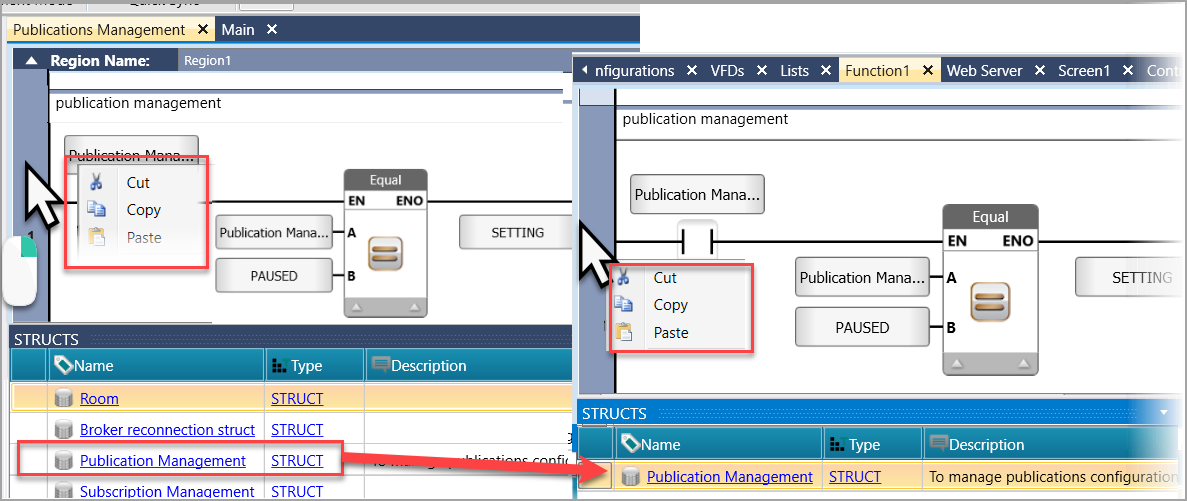
- In the source project, right-click on a rung and select Copy.
You can also select a single or multple Ladder elements, and copy them via right-click.
- In the destination project, right-right in the desired rung and select Paste.
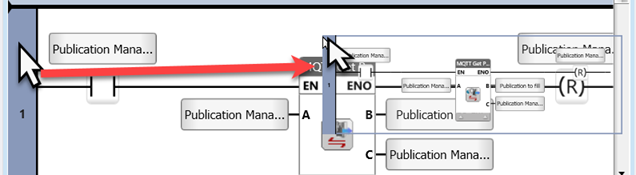
The next image shows a complete Ladder rung copied from source to destination; note that the rung comment was pasted as well, and that UniLogic has automatically created the Struct supporting that rung.
Ladder, Drag & Drop
In the source project, click on a rung and drag it to its location in the destination project.
HMI/Web, Copy & Paste between Projects
- In the source project HMI screen or Web Page, select one or more elements and press CTRL + C.
- In the destination project's HMI screen or Web Page, select one or more elements and press CTRL + V.
UniLogic automatically creates any Structs or tags supporting the elements.

Related Topics
About UniLogic
Customizing your UniLogic Environment
Keyboard Support
Information Mode: UniApps
Downloading/Uploading a project
Actions
Application Security: Passwords
Windows XP: USB Driver
