To learn how to import and use Ready-made Motion code, you can view the video, or read the topic below.
UniLogic's Ready-made Motion code does most of the work for you. Import the code, click a few times to configure your drive, motor, add an axis, and then call the function into your application to test your Motion system.
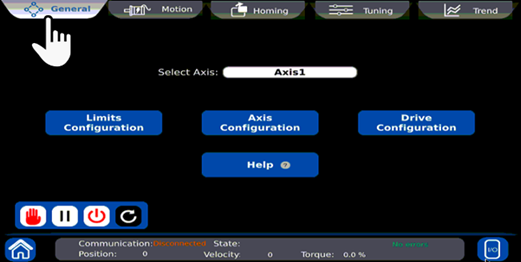
Ready-made Motion code includes both Ladder & HMI screens to enable you to run Diagnostics. You can also edit it to suit your application.
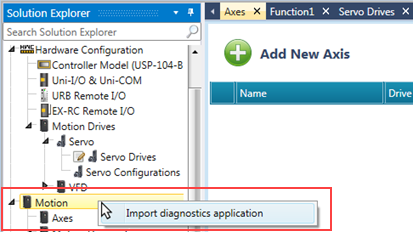
Step 1: Importing Ready-made Motion code
You can import it at any time, simply by right-clicking Motion in the Solution Explorer.
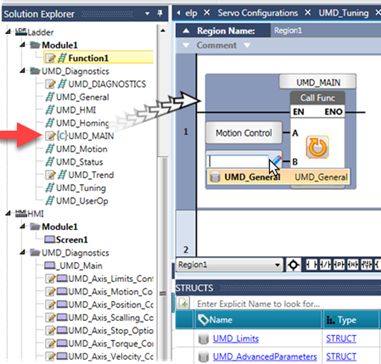
Step 2 Including it in your Application
After you have imported the code, you need to include it in your application by:
Calling the UMD_Main Function.
Linking Parameter A to the Motion Control Struct, which is automatically created when you define an Axis.
Linking Parameter B to the UMD_General_Struct.
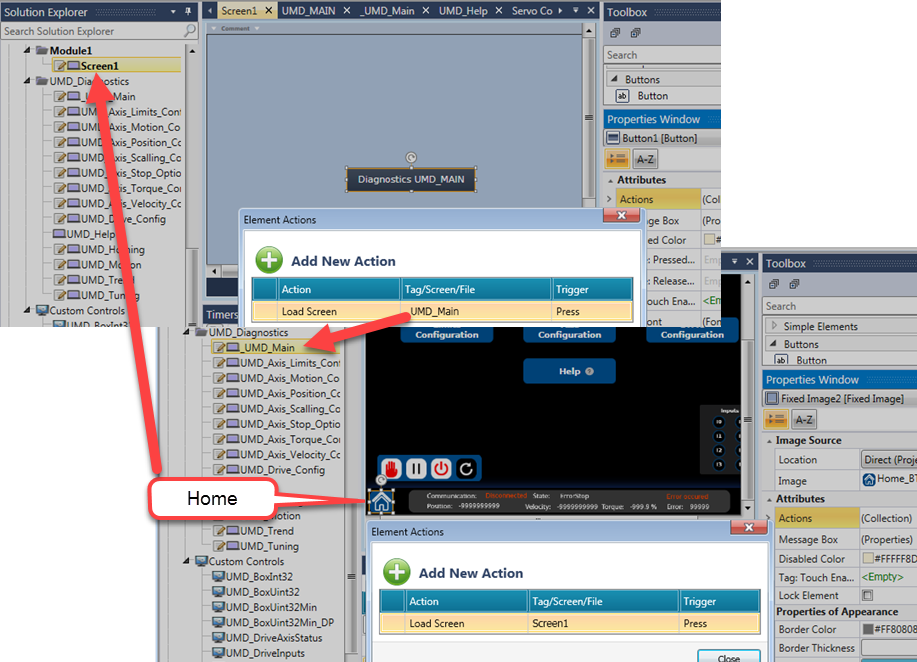
Step 3 Setting up HMI Navigation
The final step is to enable your user to navigate from your application screens
In one of your user screens, include a button with a Load Screen Action that loads the UMD_Main screen.
In the UMD_ Main screen, place a button with a Load Screen Action, linked to your user screen.
Step 4 Servo Configuration
Configure your EtherCAT or CANopen Servo drives and axes, and then download your program.
Use the button you created in Step 3 to enter the Ready-made code application, and navigate through the screens to test and tune your system.