Sending email
In order to send emails, you:
Connect the controller
|
To send email, you must assign a DNS Server.
Well-known public servers include 8.8.8.8 and 8.8.4.4 (Google), 208.67.222.222 and 208.67.220.220 (OpenDNS)
|
Configure an email accountConfigure an email account
-
On the Solution Explorer, select Emails>Accounts.
-
Click Add New Account to create a new email account configuration.
-
Configure the account properties and select the appropiate Connection TypeConnection Type according to your email server requirements.
|
|
|
|
|
|
|
|
Enabled
|
Disabled
|
465
|
When your email server requires an encrypted connection from the start.
|
|
Secure Connection (StartTLS)
|
Enabled
|
Enabled
|
587
|
When your server supports upgrading a plain connection to encrypted via StartTLS.
|
|
Unencrypted Connection
|
Disabled
|
Disabled
|
25
|
When your server does not support encryption.
|
|
|
|
|
Account Name
|
A descriptive name for this email account.
|
|
From E-mail address
|
The email address that will appear in the "From" field.
|
|
Username
|
Enter your email account username.
|
|
Password / App Password
|
Enter your email password or app-specific password, such as is required by Gmail.
|
|
Outgoing Server Settings
|
SMTP server address and port.

|
|
Use TLS
|
Enables the use of TLS encryption for the connection.
|
|
StartTLS Support
|
Enables the use of the StartTLS protocol command.
|
Note that users can also configure email Accounts via UniApps.
Compose emailsCompose emails
-
On the Solution Explorer, select Emails and click Add New EMail.
-
Use the Properties Window to:
- assign the Mail account; this account sends the email.
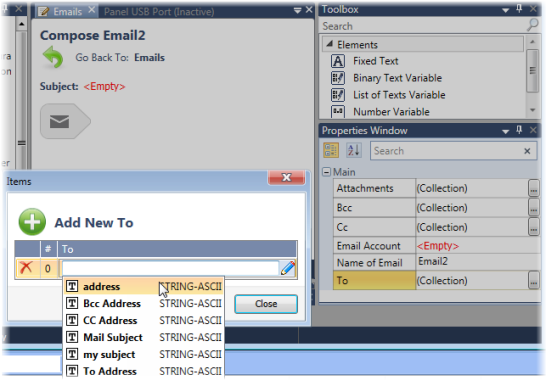
- select a String ASCII tag to supply the To Address, as well Cc and Bcc if desired
- attach data
Note that you can also enable users to add recipients via the HMI widget Mail Configurator.
-
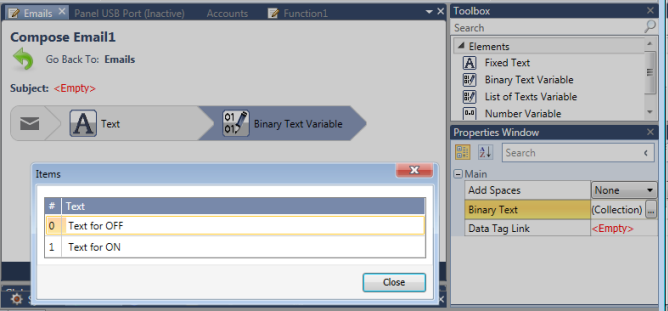
Click on Elements to add them to the body of the email, and edit them via the Properties Window.
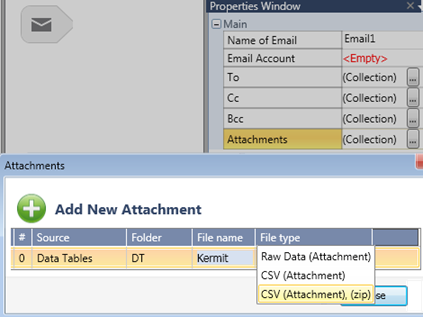
Add attachmentsAdd attachments
Click Attachments and select the appropriate type.
Send the email via LadderSend the email via Ladder
Use the Send Mail Ladder function as shown below.
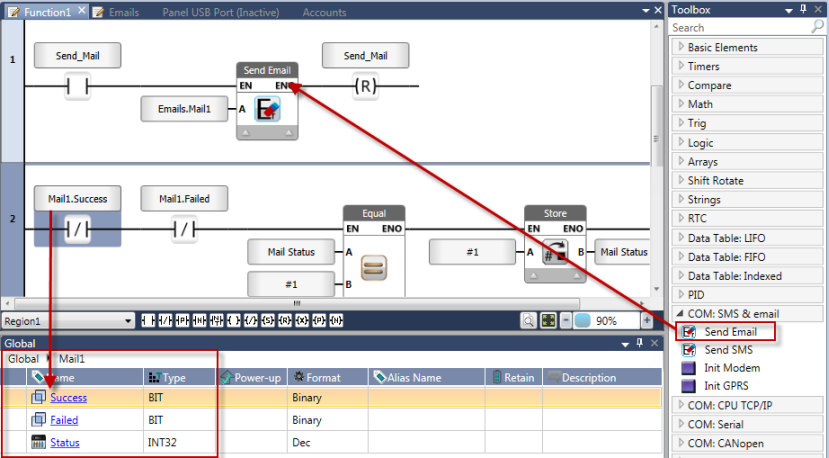
Note that when you create a mail, a supporting data tag struct is automatically created. Use the members of the struct to monitor the email status.
Email Struct
|
|
|
|
|
Success
|
Bit
|
ON=Sent Successfully
|
|
Failed
|
Bit
|
ON=Send Failed
|
|
Initialization Status
|
UINT32
|
|
|
|
0
|
No Errors
|
|
1
|
Function Started
|
|
2
|
Function in Progress
|
|
-1
|
General COM Error. Please check the physical connections.
|
|
-2
|
TimeOut error
|
|
-3
|
DNS error
|
|
-4
|
Attach File error
|
|
-5
|
Access denied
|
|
-6
|
Parse Data error
|
|
-7
|
Recipient email address error
|
|
-8
|
Packet size exceeded
|
|
-9
|
Attachment Error: No file exists/was found in the email's Configuration
|
|
|
|
-10
|
unable to get local issuer certificate' when sending an email
|
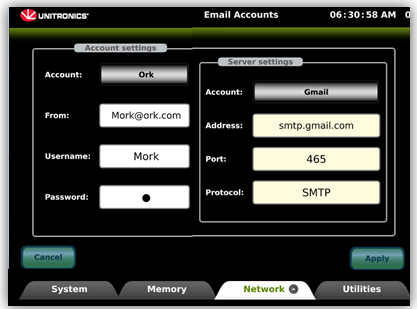
If you have more than one Account defined in your project, users can select an account and edit the From, Username, and Password parameters, as well as Server settings.
App Passwords
To enable UniStream to access Gmail, your Google
account must have activated:
In your Google Account Settings, turn on 2-Step Verification as
follows:
Enter your Google Account.
Click your user icon, select Manage from the drop-down menu, and
click Manage your Google account.

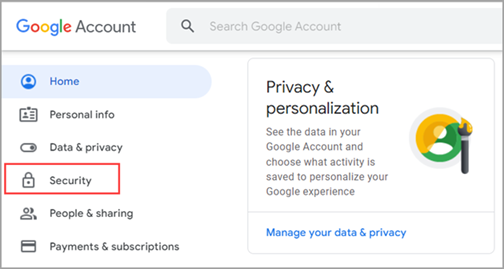
Select Security
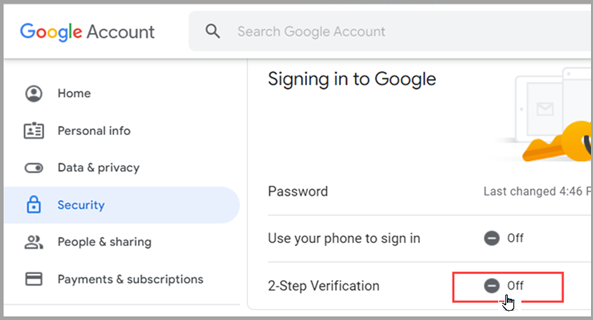
Turn on 2-step verification.
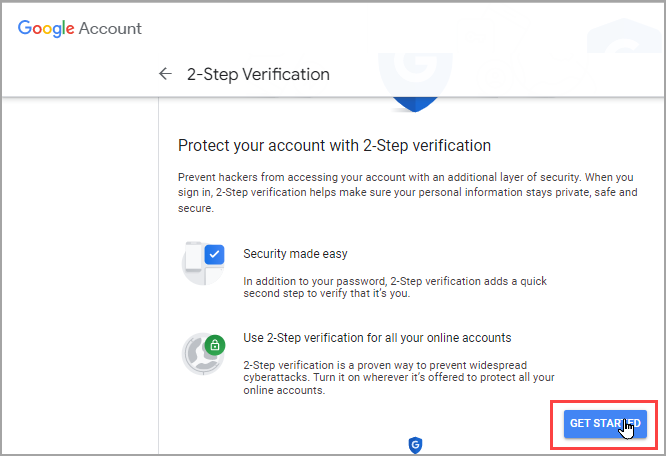
Click Get Started.
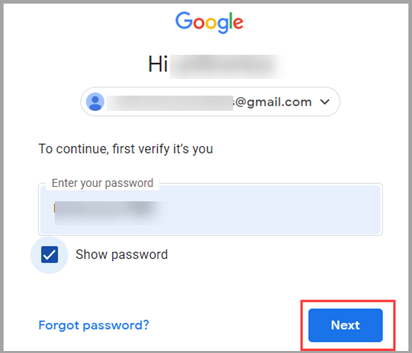
Enter your password and click Next.
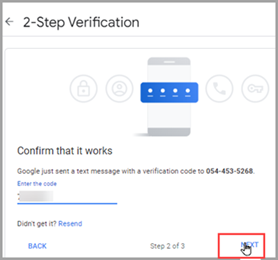
Google will send a verification code
to your bell phone. Enter the code and click Next.
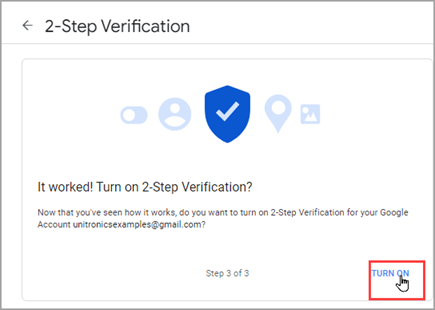
Activate 2-step verification by clicking Next.
When 2-Step Verification is activated in your
account, you can activate and get an App Password.
Enter your Google Account.
Click your user icon, select Manage from the drop-down menu, and
click Manage your Google account.
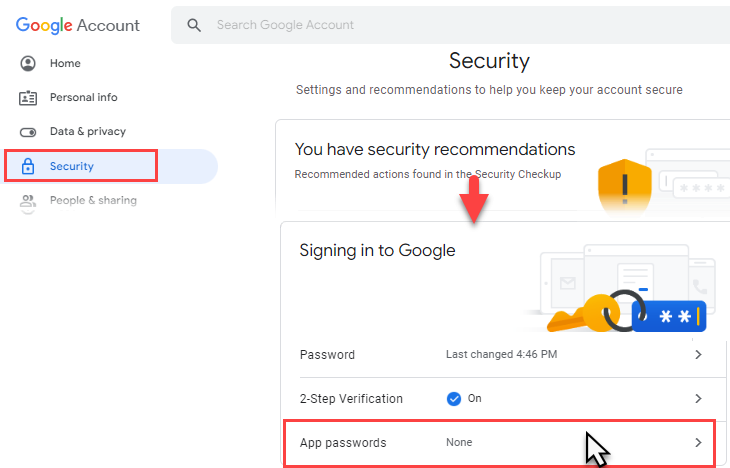
Select Security, scroll down tp App passwords
and click it.
Click Select app, and select Other.
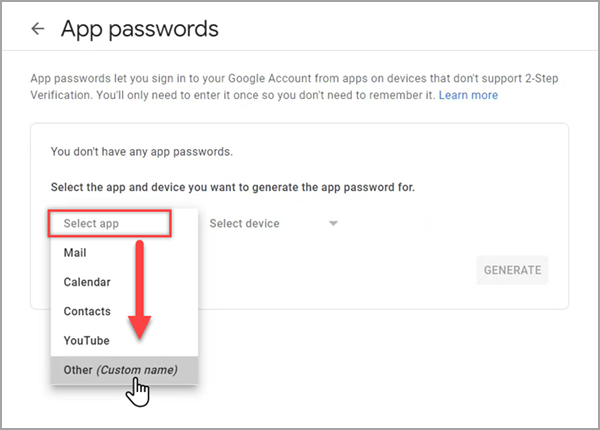
Enter UniLogic, and click Generate.

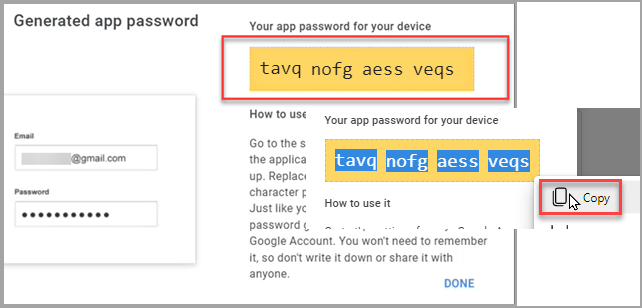
Google will reveal the App Password.
Record it, copy to Clipboard,
and click Done
This is the password that you enter into UniLogic, and that will
be downloaded into the PLC, enabling Google to identify the PLC.
 |
Ensure
that you record this password, Google will not show it again.
You can generate another password, but remember that you must
then edit the controller's email settings. |
Entering the App Password in UniLogic
Paste/enter the app password into your UniLogic
project and download it to the controller; now Google will be able
to verify the controller, and emails may be sent and received via
gmail according to your UniLogic program.

If you are connected to the Internet, you can access this UniLogic tutorial:
Sending email