HE: AI Image Widget
The AI Image Widget is an HMI image element populated by importing an AI-generated SVG package, instead of manually configuring individual images yourself.
To generate the package this widget imports, see Generating an AI Image Prompt for an HMI Widget.
Placing the Widget
Via Properties Window
-
In UniLogic navigate to HMI > Image Elements > AI Image Widget.
-
Insert the element either:
- Press Enter or double-click it to place it on the screen
or
- Use your mouse to drag-and-drop the element to the desired location.
-
Click Import Package, browse to and select the .uisvgpkg package you downloaded from Claude.
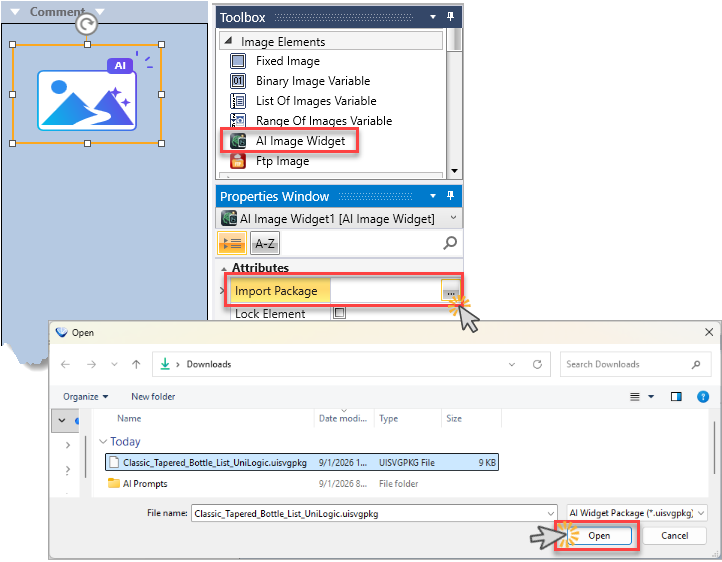
Via File Explorer
-
Browse to the .uisvgpkg package you downloaded from Claude, and drag-and-drop it on the HMI display.
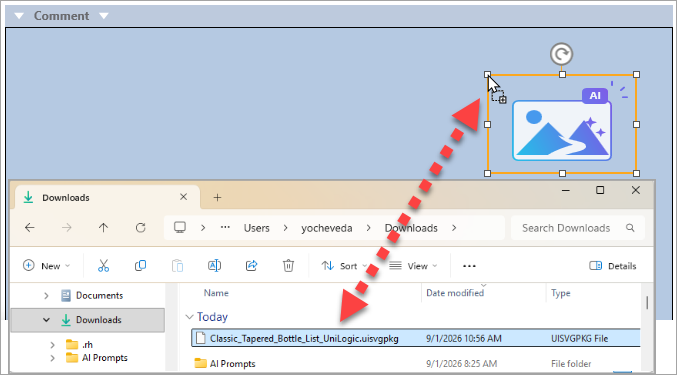
Behavior after Import
Once a package is imported, the AI Image Widget behaves exactly like the existing Image Elements widget that corresponds to the Target Widget Type you selected in the wizard:
Configure and bind this widget exactly as described in the corresponding topic above - for example, bind a widget imported from a Binary Image package to a Boolean tag the same way you would for a Binary Image Variable widget.
Updating the Widget's Images
If a generated image doesn't look right, or your requirements change, you don't need to start over from scratch.
Adjust the Visual Description or Styling choices in the AI Prompt wizard, re-export the .md file, regenerate the package with your AI assistant, and re-import it using Import Package. The new package replaces the widget's existing images.