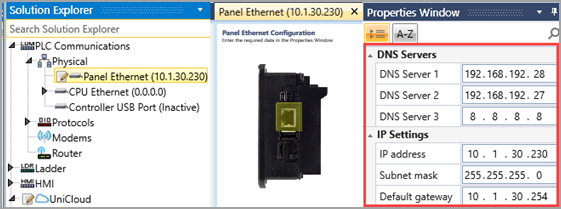
Configure the PLC's IP address, default gateway and DNS Server.
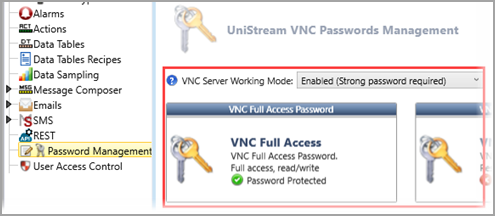
Enable VNC.
If you want to be able to access UniStream via webserver, remember to configure it in your UniLogic project.
Before you can start using UniCloud for the first time, you need to take the following actions:
In UniLogic: enable your project for UniCloud, then sign up for UniCloud (or sign in if you already have a UniCloud account), Next, you create a Asset Type,and include the tags and alarms you wish to make accessible to UniCloud. Lastly, you Sync the Asset type with UniCloud, and download the project to your PLC.
Note: After initial setup, adding or removing tags defined in the Asset Type no longer requires a manual PLC download - UniCloud handles tag synchronization automatically.
In UniApps: activate UniCloud in the PLC, either via VNC, or by physically touching the HMI panel.
Create an Asset. You can do this via UniApps, or via UniCloud.
Note that if you create an Asset via UniCloud, you need to load a Security Certificate to the PLC, when you create an Asset in UniApps, the PLC loads a certificate automatically and transparently.
In UniCloud: Sign into your UniCloud web account and create your first Dashboard.
The Asset type, along with the tags and alarms, are part of the UniLogic project, and may be downloaded to any number of PLCs. This means you can, for example, use a UniCloud dashboard to manage a series of machines spread over multiple locations.
Before you Begin: Prerequisites
Configure the PLC's IP address, default gateway and DNS Server.
Enable VNC.
If you want to be able to access UniStream via webserver, remember to configure it in your UniLogic project.
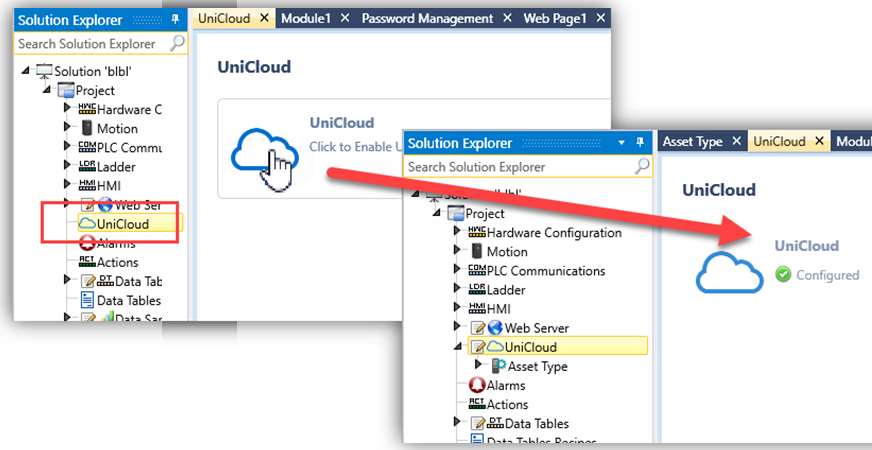
How to enable your project for UniCloud
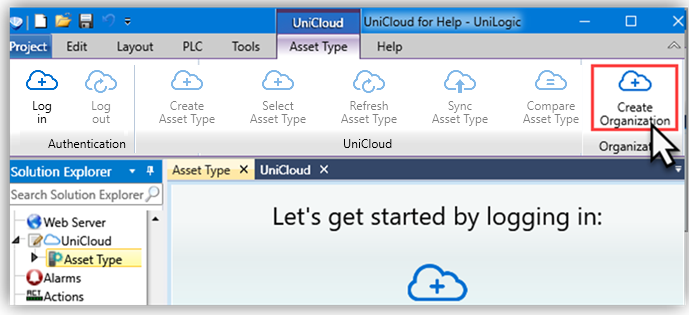
In the Solution Explorer, click UniCloud, and then click to enable UniCloud integration.
If you have a UniCloud Account, skip to How to Create an Asset Type.
If you do not have an account, create one according to the steps below.
To create your UniCloud account, click Create Organization.
Note: Use the Integration Checklist to ensure all necessary project elements are configured;  (not configured)
  (configured).
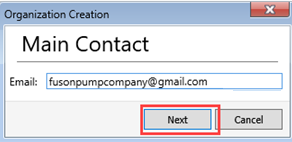
Enter the account administrator's email address as the Main Contact and click Next.
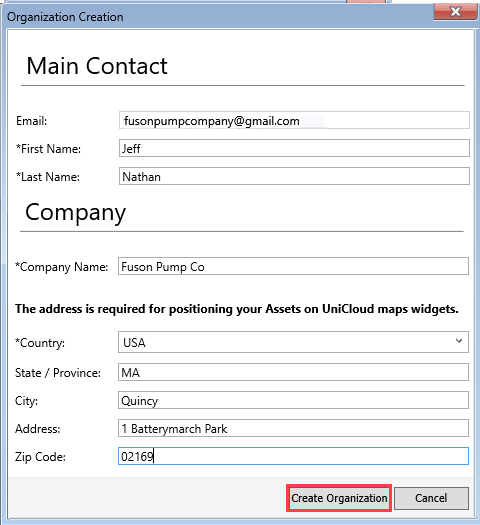
Enter the Organization's details and click Create Organization.
After you click Create Organization, UniLogic asks you to confirm the email sent to the Main Contact address.confirm the email sent to the Main Contact address.
- Access the email, confirm the account, and set your password

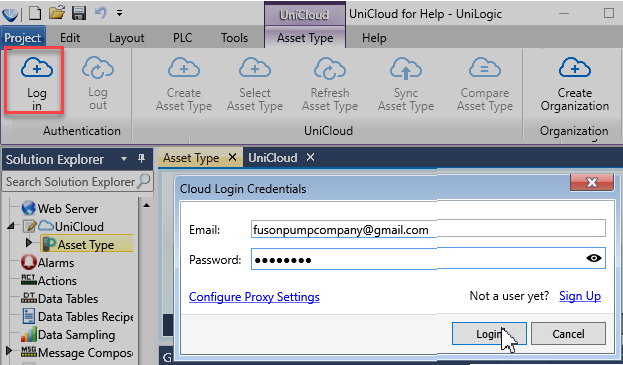
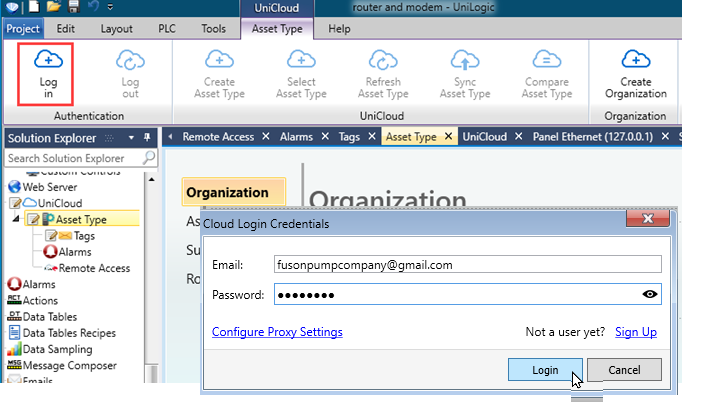
Return to UniLogic and click the Log in button on the ribbon. Use the credentials of your new organization.
You have now created an Organization and logged into your UniCloud account.
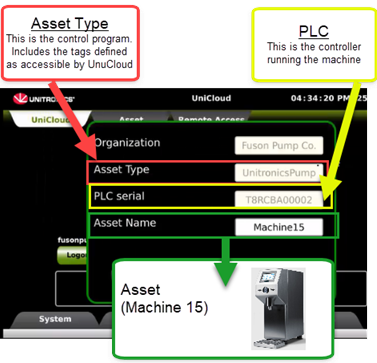
An Asset Type comprises the tags and alarms that you define as accessible by UniCloud.
Click Create Asset Type.
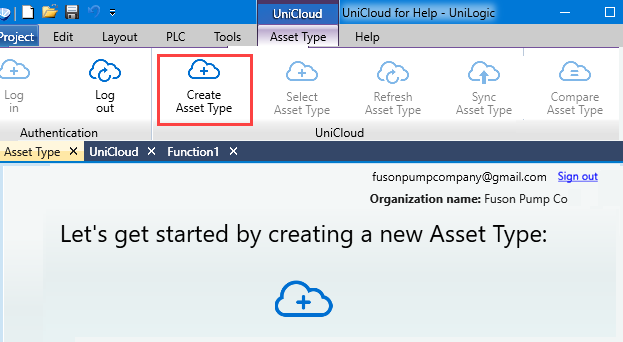
Enter the Asset Name, and click Create Asset Type.

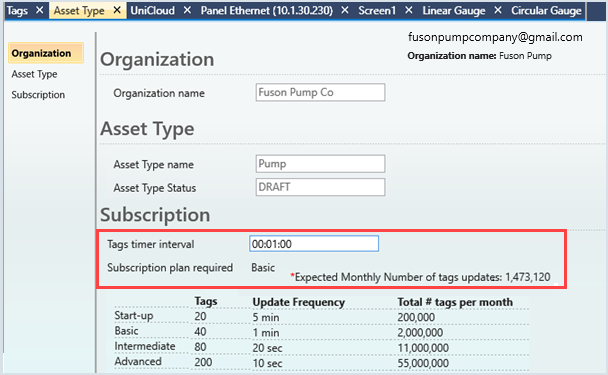
UniLogic shows the Asset Type settings.
Under Subscription, you can edit the Tags timer interval option to match your application needs. The interval determines the frequency at which data syncs to UniCloud. (Note that you can also use a Ladder element, Sync to Cloud, to force data to be synced without regard to this Tags timer interval.)
UniLogic estimates the Expected Monthly Number of tag updates according to your selections; and recommends the subscription plan you need; if you make changes in your project, UniLogic automatically updates the estimation.

How to make Tags and Alarms accessible to UniCloud
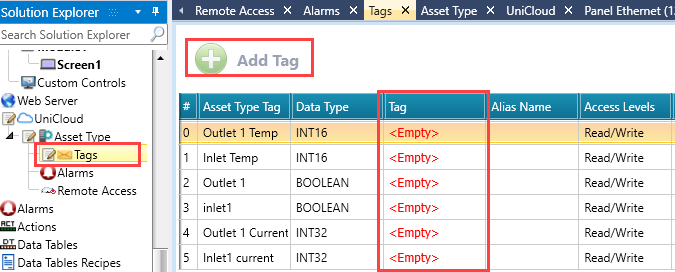
Tags: in the Solution Explorer, click UniCloud > Asset Type > Tags, and then click Add Tag.
Click in the fields to select the tags; you can select individual tags or an entire struct.
Note that you can select Access Levels: Read only or Read/Write.
Usage count is the total amount of bytes in the selected tags; the usage count is the basis for calculating your subscription needs.

As you add tags, UniLogic estimates the Expected Monthly Number of tag updates according to the Timer Interval and the tags you select, and recommends the subscription plan you need.
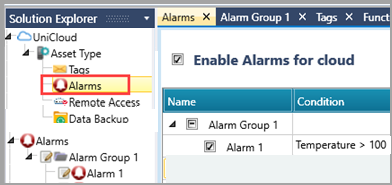
Alarms: in the Solution Explorer, click UniCloud > Asset Type > Alarms, and then click Enable Alarms for UniCloud.
Check the Alarms you want to access via UniCloud, or select the entire Alarm group.
Note that the Alarm state is pushed to UniCloud when an alarm turns on and when it is reset.
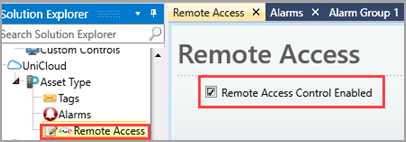
How to enable Remote Access directly from UniCloud to the Asset's PLC
In the Solution Explorer, click UniCloud > Asset Type > Remote Access, and then click Remote Access Control Enabled.
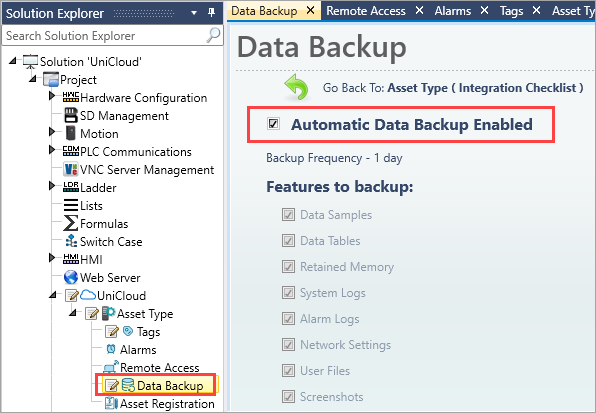
If you have a UniCloud subscription from Basic Data subscription or greater, you can back up data stored on your controller's SD to the cloud. The data is stored in the cloud in a .zip file, and can be downloaded, or restored from UniCloud back to the PLC.
The types of data that can be stored and restored include Data samples, Data tables, Retained memory values, System logs, Alarm logs, User files, and Screenshots, as well as Network settings. Note that restoring Network settings resets the PLC.
|
Notes |
|
This section guides you through activating UniCloud connectivity for your PLC, registering it in UniCloud, installing its certificate, and verifying its communication status.
In the Solution Explorer, click UniCloud > Asset Type > Asset Registration, and then click Read PLC UniCloud Connectivity State.
|
Notes |
The Read PLC UniCloud Connectivity State option is enabled only when:
|
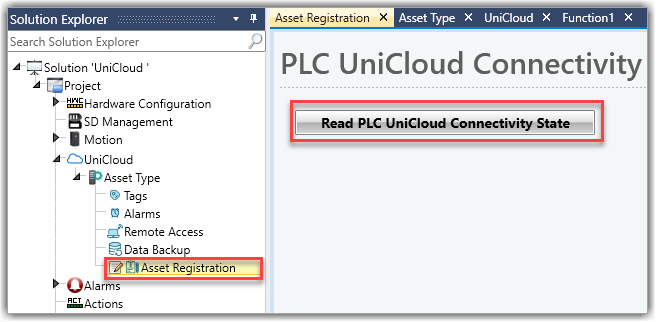
When you click Read PLC UniCloud Connectivity State, UniLogic retrieves the PLC Serial Number, checks whether the PLC is registered in UniCloud, and queries the PLC for its current UniCloud state. The resulting state determines which actions are available.
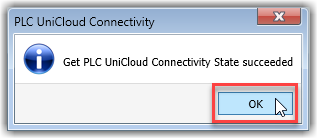
The PLC UniCloud Connectivity State succeeded screen is displayed below. Click OK.
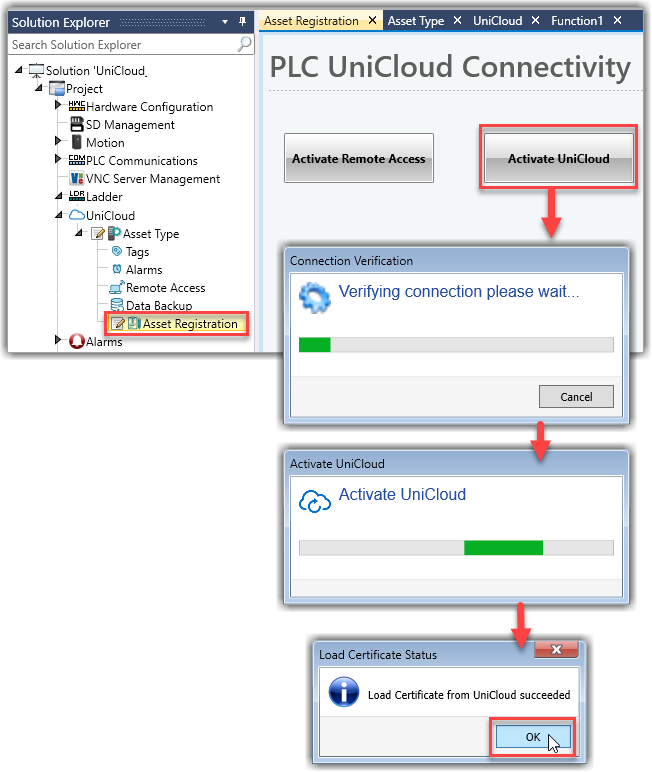
Select Activate UniCloud.
Note that during this process, a security certificate is loaded into the PLC; this process occurs transparently, without your intervention.
Click on Start Sending Data.
This connects UniStream to UniCloud; successful connection is shown when the Operation succeeded message, shown below, is displayed.

How to Register your PLC and Create an Asset
In the Solution Explorer, click UniCloud > Asset Type > Asset Registration, and then click Register PLC to register the PLC with UniCloud.
Note that the PLC Serial Number has been downloaded/synced from UniCloud; you cannot edit it.
Click the Choose Organization drop-down arrow and select your organization and click OK.
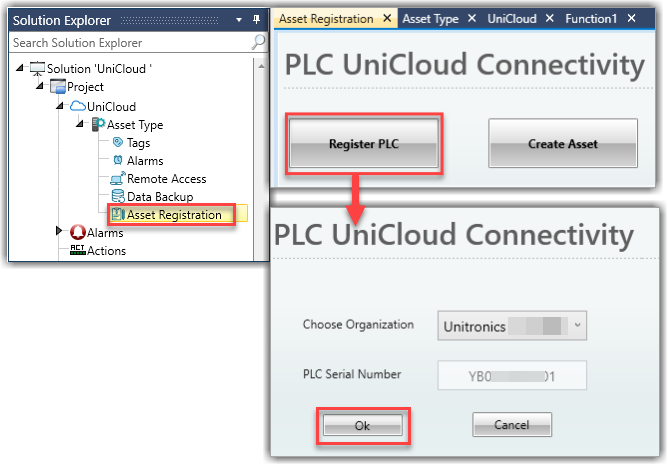
Click Create Asset to define an asset for the PLC. The Create Asset window opens.
Note that Organization and Asset Type have been downloaded/synced from UniCloud; you cannot edit them.
Fill in the Asset Name and click OK.

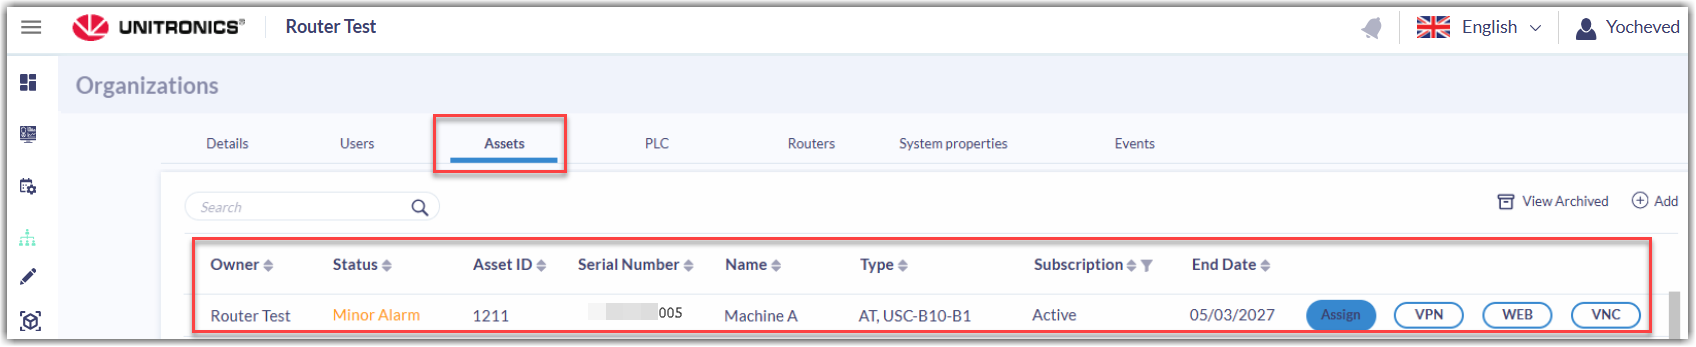
Check that the Asset was added successfully in UniCloud.
How to Sync the Asset Type
Click Sync Asset Type in order to upload it to UniCloud.

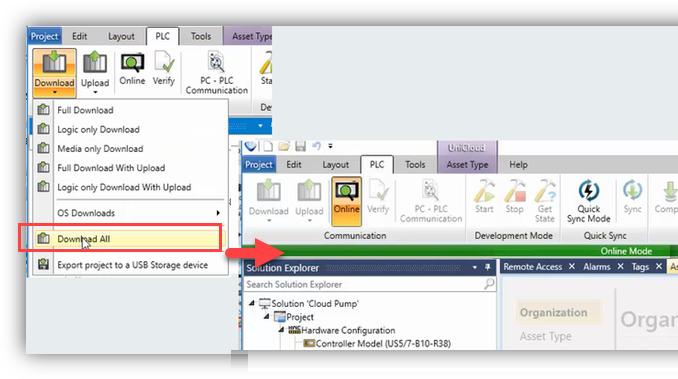
Download your project to the PLC.
Note: After the initial project download, if you make changes to your Asset Type tags or alarms, you only need to Sync the Asset Type again - no additional project download is required. The PLC detects the updated configuration automatically and applies it without interrupting your project.
Once your project has been downloaded to the PLC and UniCloud connectivity is active, you can modify your Asset Type tags and alarms at any time without downloading the project again. You can add any tag that exists on the PLC, even if it was not originally included in the Asset Type.
How it works:
In UniLogic, make your changes to the Asset Type tags or alarms as needed.
Click Sync Asset Type to upload the updated configuration to UniCloud.
The PLC automatically detects the changes, updates its internal configuration, and reconnects to UniCloud. This process happens in the background and does not require any action on the PLC or HMI.
Notes:
Only tags that exist on the PLC can be synchronized. Tags not found in the PLCs local configuration are skipped automatically.
Tags removed from the Asset Type will no longer be published to or received from UniCloud.
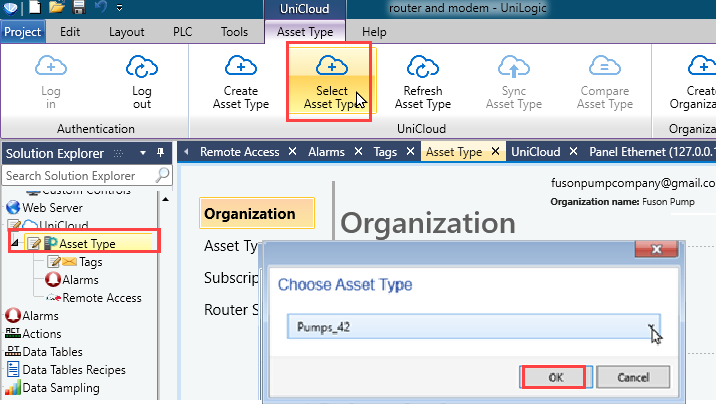
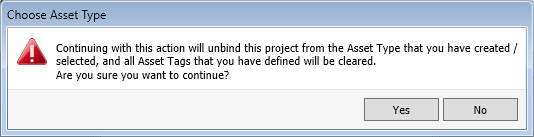
If you are signed into an organization, you can access an existing Asset Type in that organization, and link the tags defined in that type to different tags, then download it to a PLC. This does not make changes to any other PLC linked to that Asset type.
Note that if an Asset Type already exists in the project, Select Asset Type is disabled to prevent overwriting it.
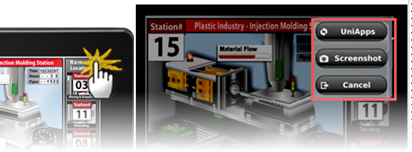
Enter UniApps:
-via VNC - click the cursor on the upper right corner of the HMI and hold the mouse button down until the UniApps popup menu appears.
-via touchpanel - touch upper right corner of the HMI panel and maintain contact until the UniApps popup menu appears.
Select the Network tab, and press the arrow on the right side of the screen to access and select UniCloud

Select Activate UniCloud, and then select Create Asset in UniCloud.

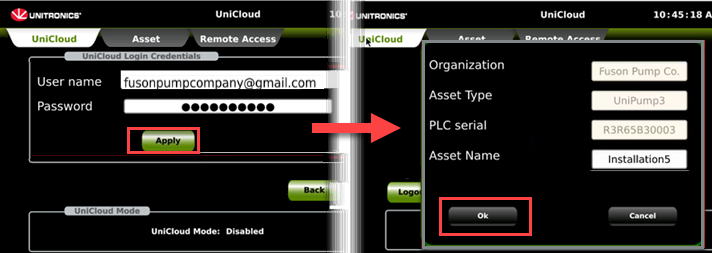
Log in: enter your user name and password, then press Apply.
The Create Asset window opens.
Note that Organization and Asset Type have been downloaded/synced from UniLogic; you cannot edit them.
Fill in the Asset Name and click OK.
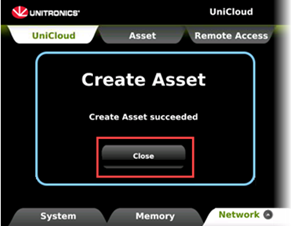
When the Asset is created successfully, click Close.
Note that during this process, a security certificate is loaded into the PLC; this process occurs transparently, without your intervention.
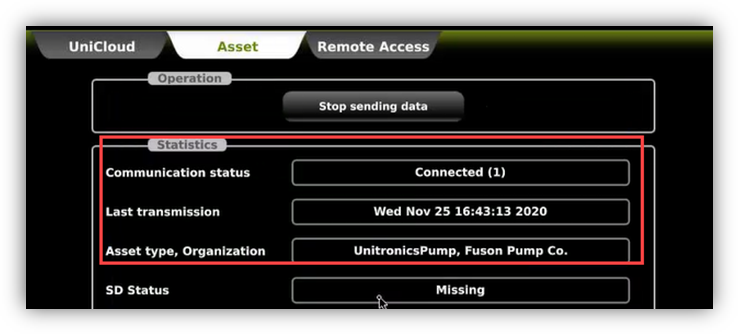
Click on Asset > Start sending data. This connects UniStream to UniCloud; successful connection is shown when the Change Status message, shown below, is displayed.
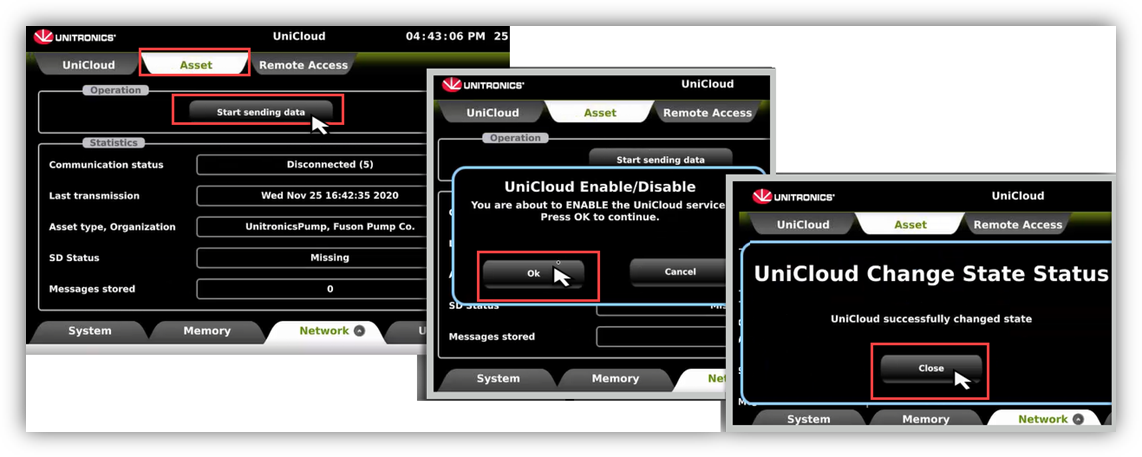
The communication status is now shown as Connected; UniCloud can now access the Asset and harvest data.
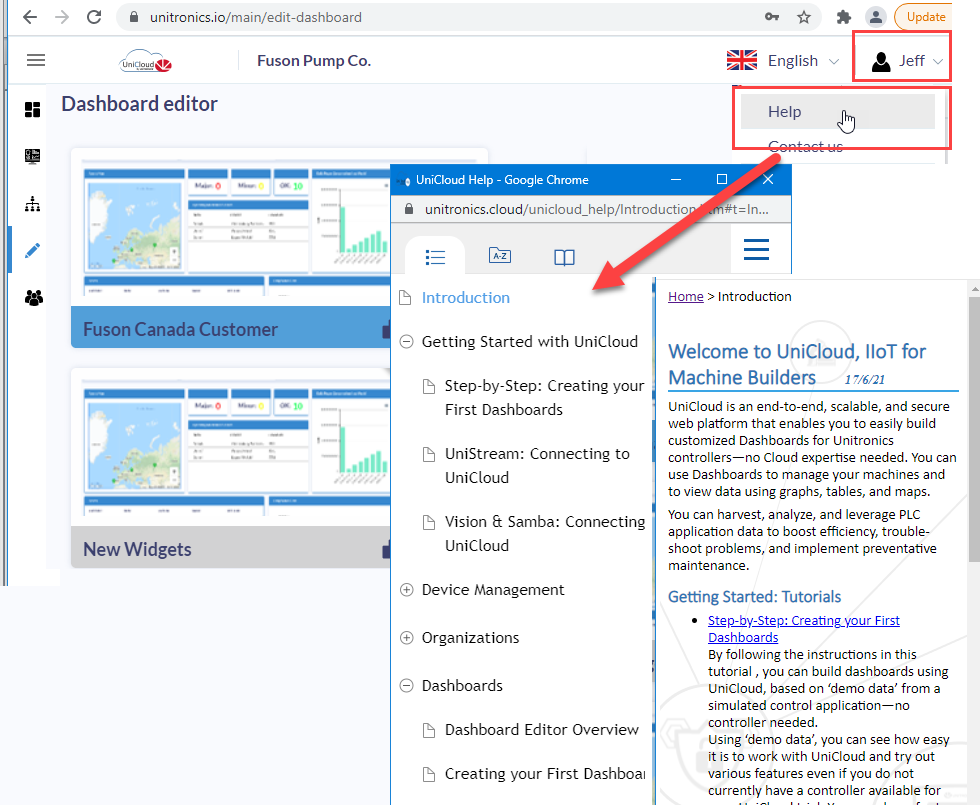
Log into your UniCloud account at https://www.unitronics.io, and then click:
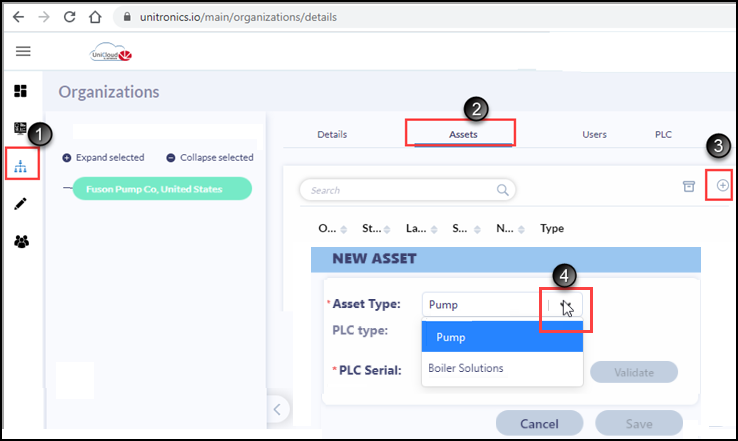
Fill in the Asset details, following the online instructions, then click Save; the Download Certificate window opens.
Click Download to save the certificate to your PC.
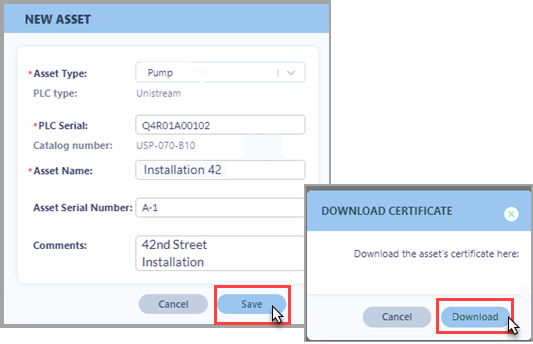
Check that the Asset was added successfully.

The Help system for UniCloud is accessible in the UniCloud website. After signing in, open the system by clicking the drop-down arrow under your login name on the right of the screen, and clicking Help.