Reusing Your Work: UDFBs, Screens, Custom Controls, Web Pages
You can import and export Ladder UDFBs , HMI Screens, HMI Custom Controls, and Web Pages and use them in any UniLogic project.
You can also convert HMI Screens to Web Pages.
|
You can export files by right-clicking them and selecting Export.
Note that data tags are ported together with these files.
File extensions are as follows:
|
|
|
|
Ladder Module
|
.ullme
|
|
UDFBs
|
.ulle
|
|
C functions
|
.ullce
|
|
ST functions
|
.ullste
|
|
HMI module
|
.ulhme
|
|
HMI screens
|
.ulhe
|
|
Custom Controls
|
.uluce
|
|
Web Server Module
|
.ulwsme
|
|
Web Page
|
.ulwse
|
|
|
Global Library
UniLogic also offers a global library that is accessible from the Solution Explorer. The library is located in ..:\Users\MyName\Documents\Unitronics\UniLogic.
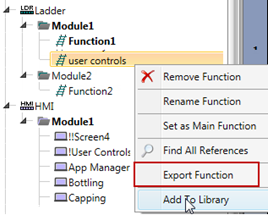
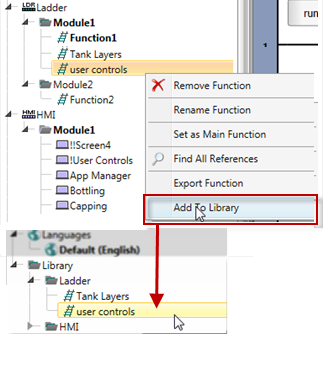
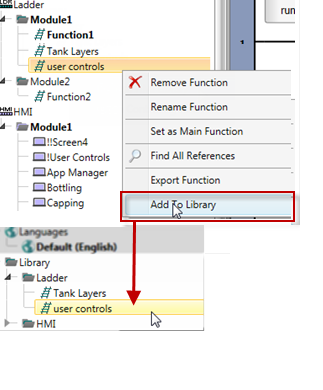
Adding to the Library
|
Via Solution Explorer
-
Right-click the desired UDFB, C function, or HMI screen.
-
Select Add to Library; the export process begins.
-
The UDFB or screen will appear in the Library.
|
Manual update
You can also manually place files into the Library folder.
However, in order to view files in the Solution Explorer after placing them, you must select Refresh from the relevant right-click menu.
|
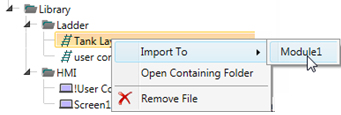
Importing Files from the Library
 |
You cannot drag and drop elements directly from the Library into your project.
You must import it first. Once any element has been imported into the project, you can drag and drop it from the tree.
|
|
Via Solution Explorer
-
Right-click the desired function or screen.
-
Select the module you want to import to and follow the on-screen directions.
|
|
At the end of the Import process, compile your project to check for unsupported elements.
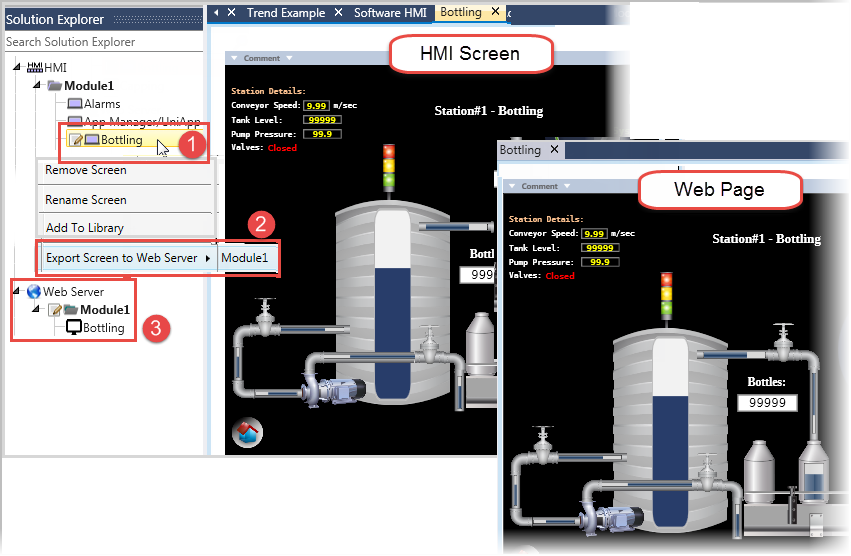
On the Solution Explorer, right-click the screen
you want to export, and select the Web Server module you wish to export
to.
Note that not all HMI elements are supported by the
Web Server; UniLogic displays an error list of any elements that cannot
be exported at the end of the export process.
HMI Custom Controls
You can create your own, reusable HMI Custom Controls.
To create a control:
Place and define HMI
elements.
Assign tags to these
elements.
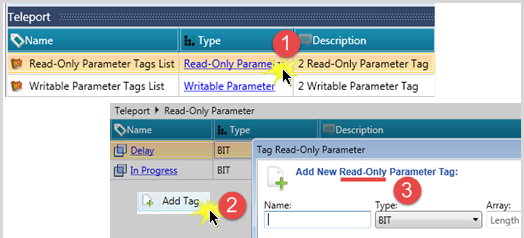
You can define tags that are local to the custom control. These may
be read-only, or writeable.
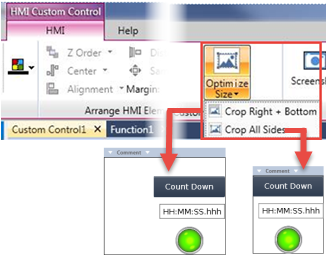
Use the Optimize Size
option to trim the empty space surrounding the elements in your control.
After you create the control, you can drag and drop
it from the Solution Explorer, export/import it between projects as .uluce
files, or add it to the Library. Any tags that you have defined
as tags that are local for that Custom Control will be exported/imported
along with the control.
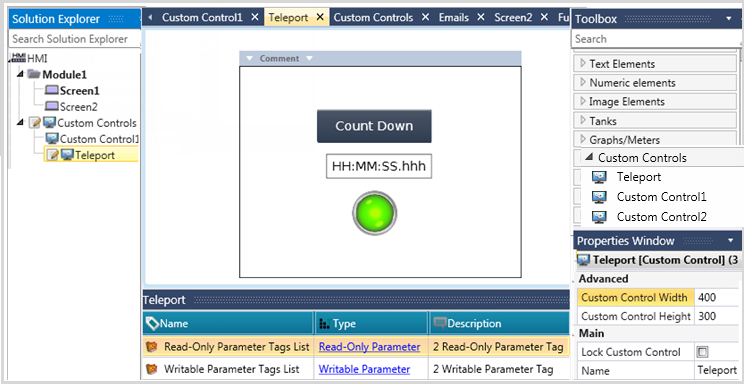
Creating a Custom Control
Either
- Right-click Custom Controls and select Add Custom Control,
or
- Click Custom Controls and select Add Custom Control.
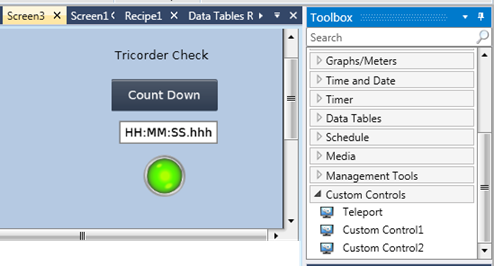
From the Toolbox, drap and
drop the HMI elements you want to include in the Control.
To add local parameters,
click the appropriate hyperlink in the Tag pane, and then right-click
and select Add as shown below.
Trim the empty space by
using the Optimize Size options
After you have created the
Custom Control, it will appear in the HMI Toolbox, from where you
can drag and drop it just as you would any HMI element.
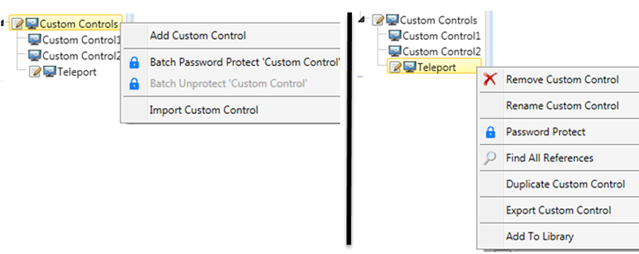
Managing Custom Controls
To assign passwords, import/export and more, use
the right-click options for the Custom Controls and the ones for individual
controls.
.
Related Topics
User-Defined Function Blocks (UDFBs)