You can create your own, reusable HMI Custom Controls. To create a control:
Place and define HMI elements.
Assign tags to these elements.
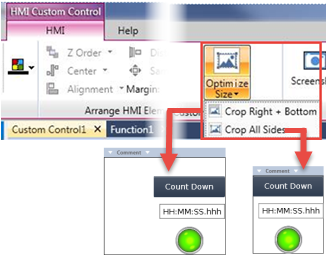
You can define tags that are local to the custom control. These may be read-only, or writeable.Use the Optimize Size option to trim the empty space surrounding the elements in your control.
After you create the control, you can drag and drop it from the Solution Explorer, export/import it between projects as .uluce files, or add it to the Library. Any tags that you have defined as tags that are local for that Custom Control will be exported/imported along with the control.
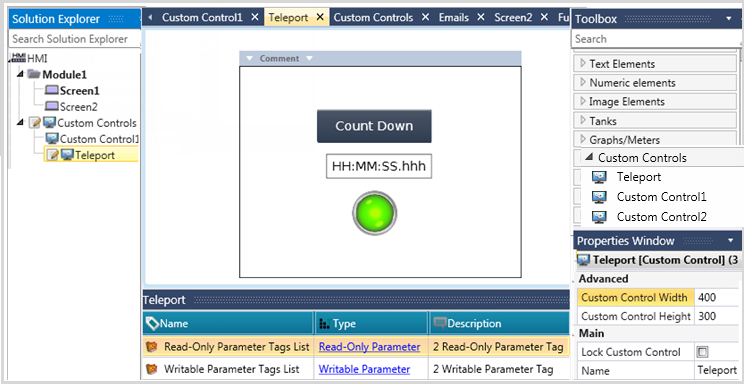
Creating a Custom Control
Either
- Right-click Custom Controls and select Add Custom Control,
or
- Click Custom Controls and select Add Custom Control.From the Toolbox, drap and drop the HMI elements you want to include in the Control.
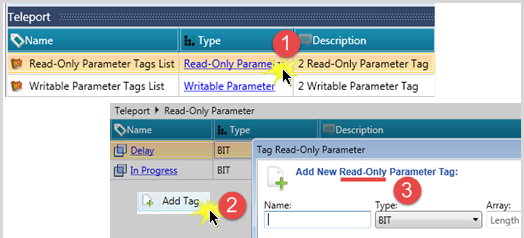
To add local parameters, click the appropriate hyperlink in the Tag pane, and then right-click and select Add as shown below.
Trim the empty space by using the Optimize Size options
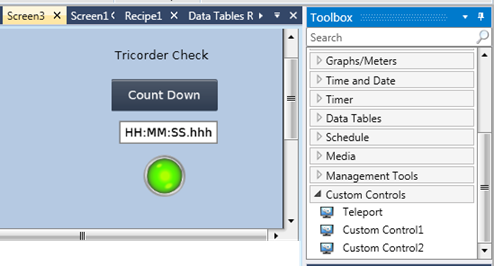
After you have created the Custom Control, it will appear in the HMI Toolbox, from where you can drag and drop it just as you would any HMI element.
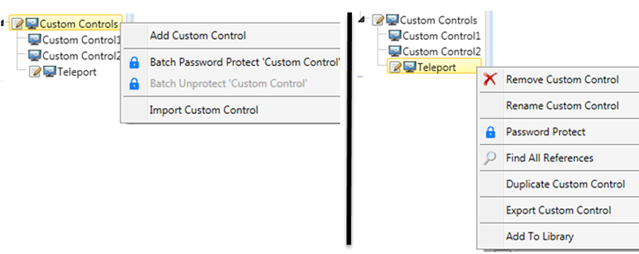
Managing Custom Controls
To assign passwords, import/export and more, use the right-click options for the Custom Controls and the ones for individual controls.
.