UniStream can function as an:
SNMP Agent (slave)
SNMP Trap
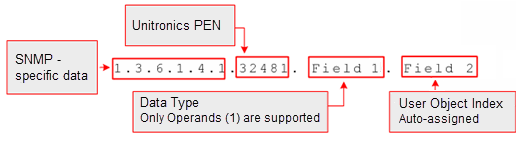
The unique PEN number assigned to Unitronics is 32481.
The figure below shows the SNMP command format.
To begin working with SNMP, select it from the Solution Explorer.
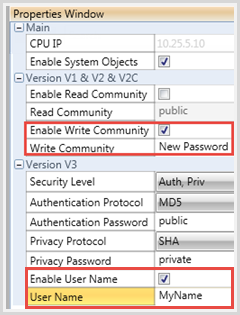
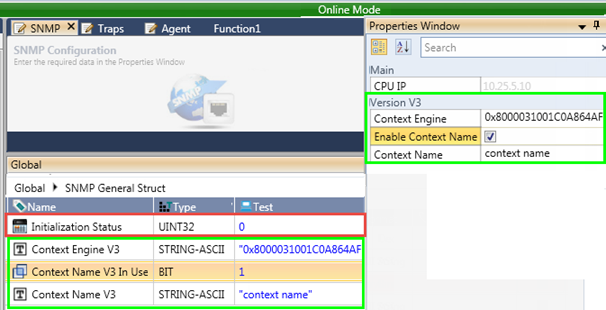
Note that, in the Properties Window:
The CPU IP is the address assigned in PLC Communications>CPU Ethernet.
To assign a Context Name, first check Enable Context Name, then click in Context Name and enter the text.

You work with and manage SNMP via structs, which are automatically created by UniLogic as you select SNMP options. These structs support all of the properties required by the SNMP protocol.
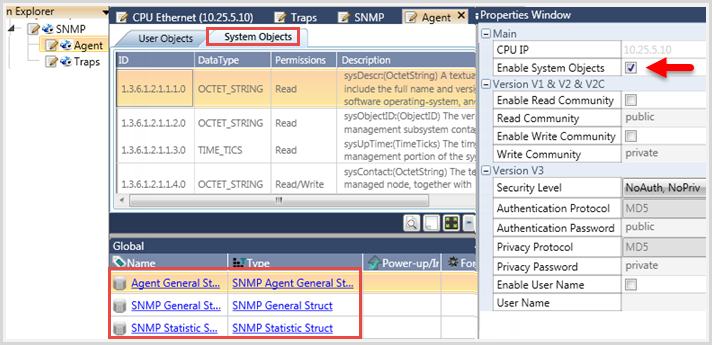
To configure SNMP Agent properties, select it from the Solution Explorer.
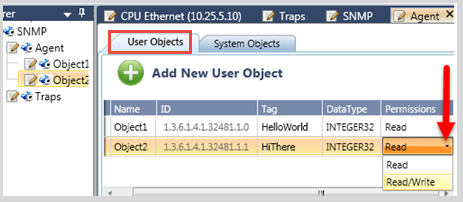
Note that the main SNMP Agent window has two tabs, System Objects and User Objects.
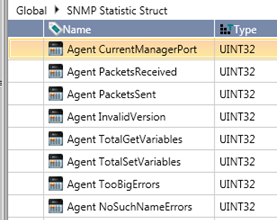
In the Properties Window, you can enable System Objects and select SNMP versions. Selecting System Objects, or defining a User Object, creates three structs, SNMP General Struct, Agent General Struct, and the SNMP Statistics Struct.
|
The Version properties are context-sensitive. Version options such as community passwords are disabled by default, but are enabled as you select properties. |
|
|
If, in the following structs, the parameter Initialization Status is not 0, contact Support. |
|
If Initialization status is not 0, contact Support. |

To include application data in SNMP communications, use User Objects:
Select the User Objects tab, and then click Add User Object.
Configure the fields:
- Edit the default object Name, if desired.
Note that UniLogic automatically creates an ID number for each object which includes the Unitronics PEN; the ID cannot be edited.
- Add a data Tag.
- Set the Read/Write permissions for each object.
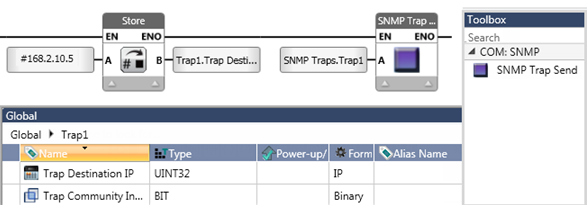
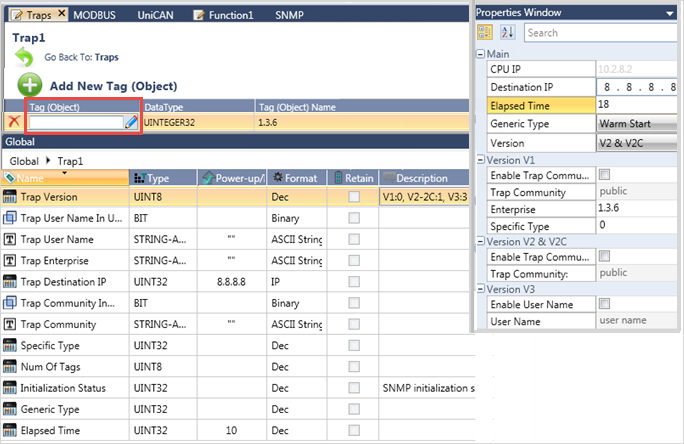
To configure Traps:
Select Traps from the Solution Explorer.
Use the general Trap properties to set the general SNMP V3 properties for all Traps.
Note that you must enter the authentication and privacy passwords.
Click Add New Trap; once you add a Trap, the Trap General Struct and Trap Statistic struct are automatically created by UniStream, as well a struct to handle each Trap that you add.
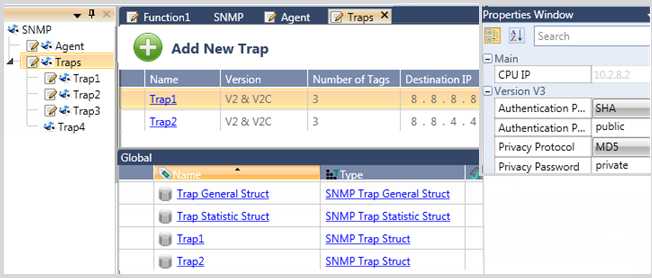
Set the Trap properties, including the Destination IP. You can also enable Version properties for each Trap.
You can add up to 4 tags (Objects) per Trap.
In addition to the IP address that you define for each Trap, the Ladder function SNMP Trap Send enables you to send any Trap to a specific IP address.